How I fixed the door.
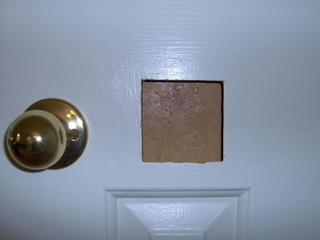
I fixed the hole in the door almost exactly as one would fix a hole in drywall. First, using Microsoft PowerPoint I drew a square, 3 inches on a side, and printed it. I cut that out with scissors, cut out MOST of the inside of the square and taped this in place over the problem spot.
Next, using a Dremel and cutting wheel, I carefully cut out the problem area to the lines on the paper template and removed the paper.
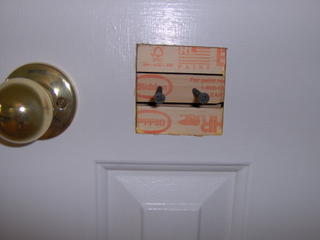
I needed a "backer" for the patch so I cut 3 pieces of wood from a paint stir stick, 1 inch longer than the length of the hole. I applied glue to a half inch on each end, slipped them into the hole, and held them in place for a couple of minutes for the tack on the glue to set up. The top and bottom sticks were done first. The middle was done last. The screws were inserted to give me something to hold to apply pressure as the glue set up.
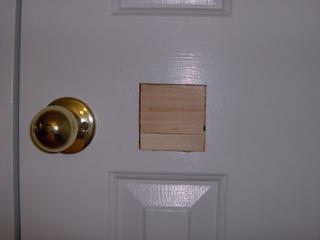
ONE DAY LATER, after the glue was fully cured, I cut 3 more pieces of stir stick to patch the hole. This particular stick, supplied when you buy Glidden paint, was just about the perfect thickness. Other sticks were too flimsy. I glued the pieces in place and waited a day for the glue to cure.
Next, I applied a filler compound with a putty knife to fill in the gaps. I applied more filler than needed, waited for it to cure, and sanded everything down flush.
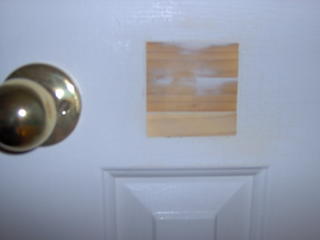
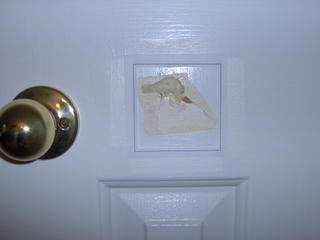
Finally, I applied 3 coats of paint, but only on the center "rail" of the door (if I were going to paint the whole door I would have just bought a new one). If you look carefully you can still see slight indentations that mark where the patch is. A little tough to see because the paint was wet and gave off a shine when I snapped the picture. The patch is just about invisible and is easily missed at a casual glance. It is done correctly and I am pleased with it. So much better than what the previous homeowner tried to do (put masking tape over the hole and paint over the tape).

posted by Tim B. @ 8:39 AM
0 comments
![]()

0 Comments:
Post a Comment
<< Home