Plumbing the shop for air
I have a new air compressor and have long desired to install plumbing with "drops" for various spots in the shop. So I conferred with some fellow woodworkers and got some advice. Based on the advice I am going to run 3/4 inch copper pipe through the shop, and install 4 "drops". The first one will go to the outside of the shop so I can keep a hose on the side of the building for car tires, etc. Then at 6 foot intervals I will install 3 more at just over 6 feet off the floor which allows for a 6 foot cabinet I have.
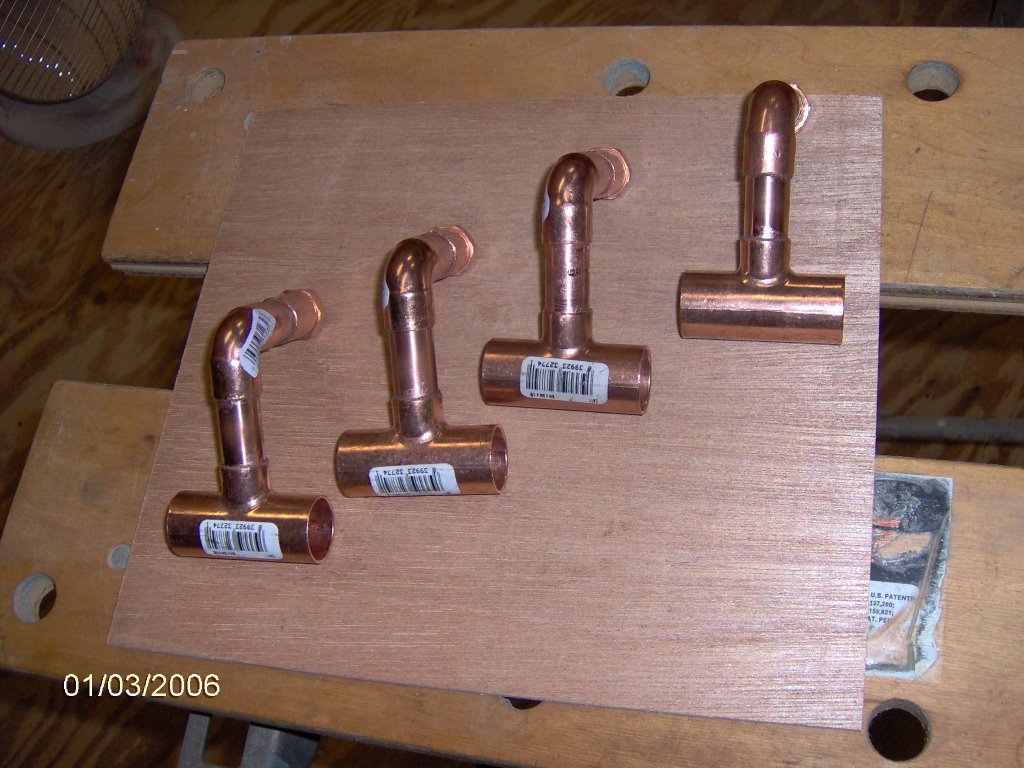
This photo is what I envision for a drop, minus the quick connect that I still need to buy. The 3/4 inch pipe gets a reducing "tee" down to 1/2 inch. This comes out the top of the pipe so moisture can drop back down to the drain when air is not used. After that there is a 1/2 inch elbow and threaded coupler into which the quick connector will go.

Here are the 4 drops, cleaned, fluxed and fit, waiting to be "sweated".
The first one was then set up in the workmate and all the joints were soldered, then cleaned with a moist rag. I inspected all the joints carefully, looking for any missed spots. Maybe I put in too much solder, but better that than an air hiss later.

This last picture is as far as I got tonight. All the 1/2 inch pipe, 1/2 inch fittings, and valves are installed. All that is left is to connect them together with the 3/4 inch main line and screw to the walls.

The above picture depicts the entire layout, but in miniature. The hose represents where the compressor will plug into the pipes. Then there is a shut off ball valve so that I can disconnect the compressor without a loud/long burst of air. Then a "tee" into the main line. Below the "tee" I reduced to 1/2 inch pipe for a moisture drain (the 1/2 inch ball valve and a reducer were cheaper than a 3/4 inch ball valve). Going up, the first thing is the "drop" to the outside. Then an elbow and a jog to the left. Then 3 more drops, then a 3/4 inch cap. The height of the main line will be just over 6 feet and the distance between drops will be about 6 feet.
I should easily be using this by the weekend.
posted by Tim B. @ 9:41 PM
5 comments
![]()

5 Comments:
Make sure you slope the main line so the water drains.
You bet!
I figured on making marks on each stud starting at the capped end, and marking each stud a little lower than the one to it's left. I don't know how much slope is needed, but I was thinking about 1/8 inch each stud (16 inches). That's a half inch per 4 feet. I'm running 16 feet horizontal, so that's a 2 inch drop. Since it's copper I don't think I have to worry about how slow the moisture drains...just that it does drain.
What do you think?
At all the places that I worked we always used galvanized pipe for air lines. I don't know why, price perhaps.
put in a water trap, Harbor Freight sells a reasonably priced device , its about 10 inches tall and 3 inches diameter, The trap takes out about 95% of the water.
TP tools website seems to be the gold standard fro shop piping tips. http://www.tptools.com/statictext/airline-piping-diagram.pdf They don't suggest the slope value, just that it be sloped. I think anything is better than nothing. It matters more how much room you have in the shop to make the run with the slope and still have all the drops come out at the right locations.
Post a Comment
<< Home