Part 4: Pretty tools and boxes
Continuing on.
I made a dumb mistake that set me back a little. The 4 part frames for the boxes were a little bit off in the corners. I tried passing them through the thickness planer to true them up and ended up making a tear-out mess. Very unsatisfactory. So I carefully cut out the torn up pieces, made some replacements, and glued up new frames.
Then I glued up all 6 panels to make the tops and bottoms of the 3 boxes. These were planed to 1/4 inch thick. I have glued the bottom onto all 3 boxes, trimmed them close to exact, and trued them up with on the router table using a straight "pattern" bit. This bit has two cutting edges that are lined up perfectly with a bearing. The box side runs along the bearing and the cutters remove the excess. Does a GREAT job.
Two bottoms done and getting ready to do the third.

Shows the pattern bit in the router table and the wood to cut off.

All three bottoms done.

Next was to glue on the tops and then do the same router magic. Look how many clamps it takes.

So like mentioned before they now look like cigar boxes that can't be opened.

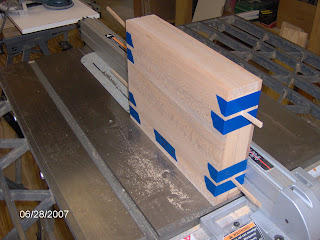
Then some sanding, then cutting the tops off. There is a method to cutting boxes. First, do the two ends, then tape the ends and put shims into the saw kerf, then do the front and back.

Works like a charm if one keeps the same face of the box against the fence for all four cuts AND does not move the fence. ALMOST made that mistake.

Next will be more sanding, staining, and then finishing. Still need to work on the tray inserts a little (bondo/filler/grinding/smoothing) then install and spray in the flocking. Probably a few more easy days and this will be done.

2 Comments:
these really look nice. What happened to the kitchen garbage can? Did I miss the grand finish?
No, I needed to get these done first, so the kitchen thing is on a different burner.
And, I have another update to this one, Part 5, coming in a day or two. It will CONCLUDE (that's right, CONCLUDE) with part 6.
Post a Comment
<< Home