Anatomy of a pen
For anyone who is curious about how pens are made.
Starting with a block of wood, cut it into two rectangular pieces that are about 3/4 x 3/4 by 2+1/4 inches. Then drill a 7mm hole down the length in the approximate center. Rough up the brass tube inserts with sandpaper, apply glue, and slide them into the holes. Let cure overnight. Mount the two blocks together on a "mandrel" on the lathe, turn the the desired profile, sand very smooth, and apply stain/finish.
Press the pen tip into one "barrel" and the clip/cap into the other barrel. Press the brass end of the twist mechanism into the other end of the barrel that has the tip (not too far at first...will be fine tuned). Screw in the pen refill. Twist to "open" to check how far the refill comes from the pen tip. If a little more is desired, remove the refill and press the twist mechanism in a little more. It cannot be backed out, so care must be taken. Finally, slide the trim ring over the twist mechanism then the bottom barrel. Done.
Here is a picture showing the relative order (top to bottom) of how it is done, and the relative positions (left to right) of the pen parts.

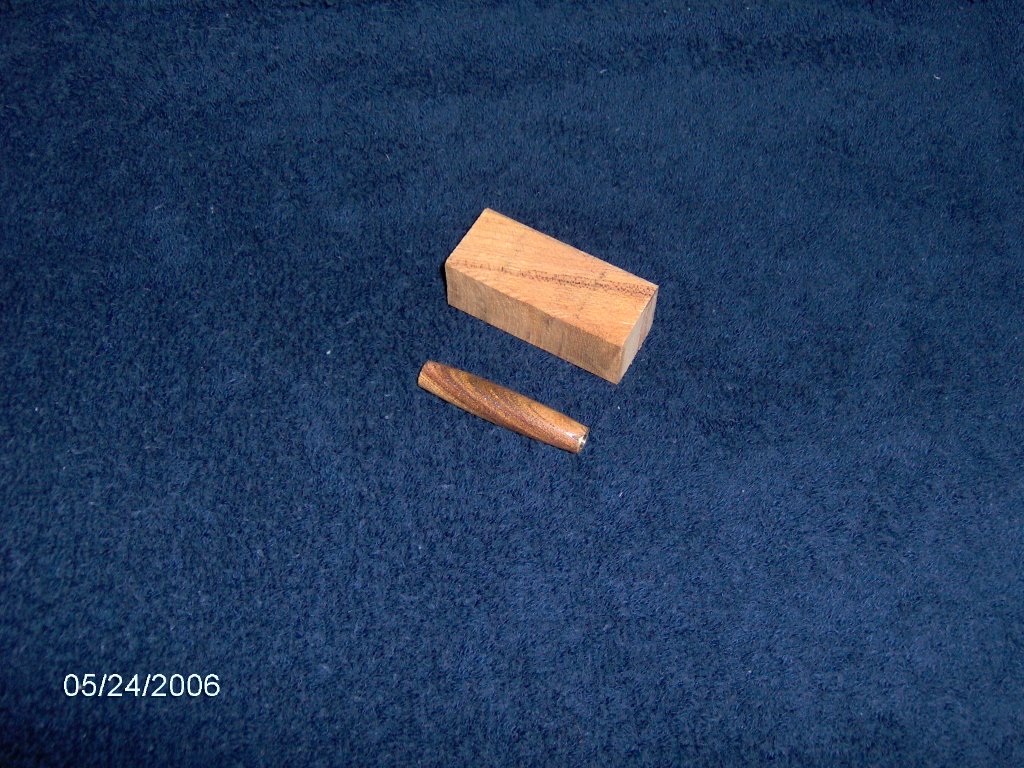
The next picture is a sort of "before and after". I am always amazed at how pretty just about any block of wood is when it is machined. A fairly attractive yet rough piece of wood like this red keiyaki comes out beautiful. If you look really closely at the right end of the finished piece you can see that a little chip came off and exposed the brass tube. The piece is ruined but I still finished it to see how nicely it sands and takes stain and finish. I like the look of this wood very much and have enough blanks to make 3 more pens from it.
posted by Tim B. @ 8:30 AM
1 comments
![]()

1 Comments:
Amazing work. Very beautiful.
Post a Comment
<< Home