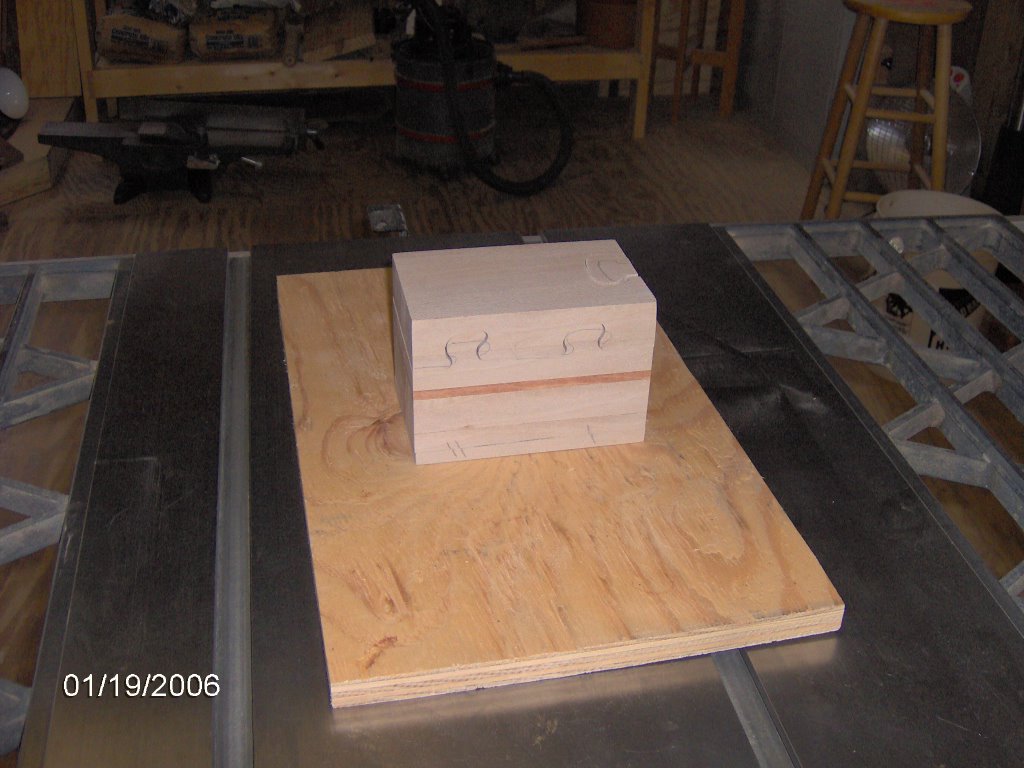
Puzzle box 1 of ?
I am making this puzzle box for a friend. In the past I have had so much difficulty with just such a box, but didn't give up. I learned how to tune up my bandsaw and this time (3rd try) I am successful.
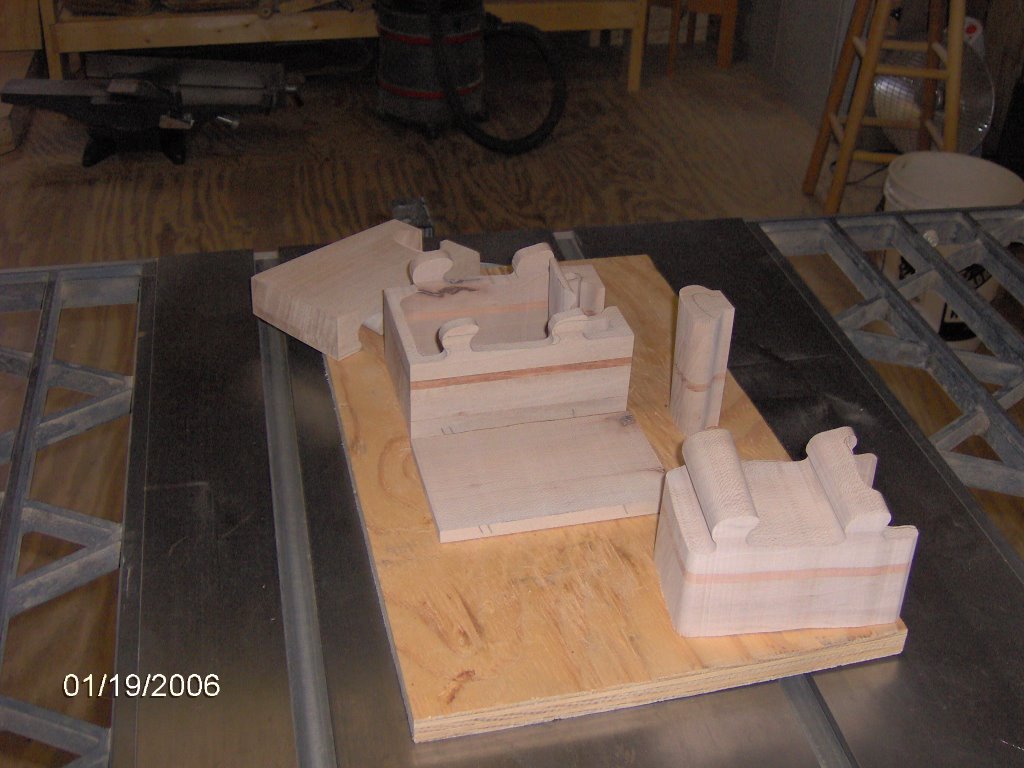
Here it is assembled, but before sanding, staining and finishing.
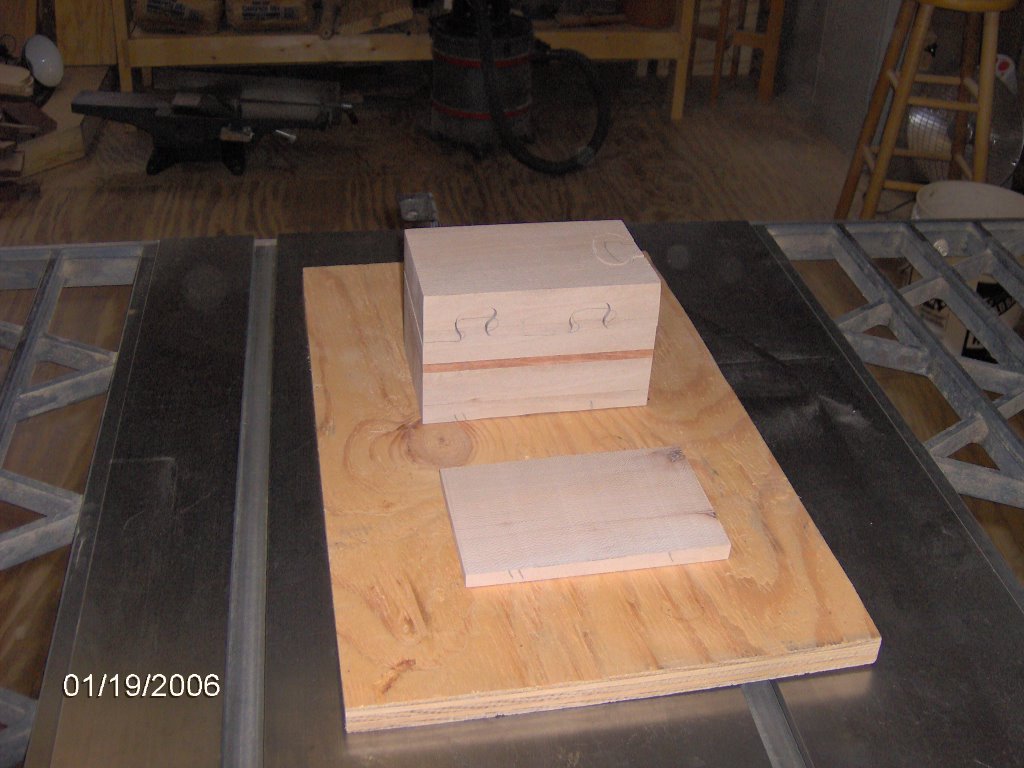
How does one cut a puzzle box? Well, imagine that the picture above was a solid block. First you cut off the bottom and set it aside. This allows for hollowing later.
Next you cut out a "key" which slips in and out to hold the top in place.
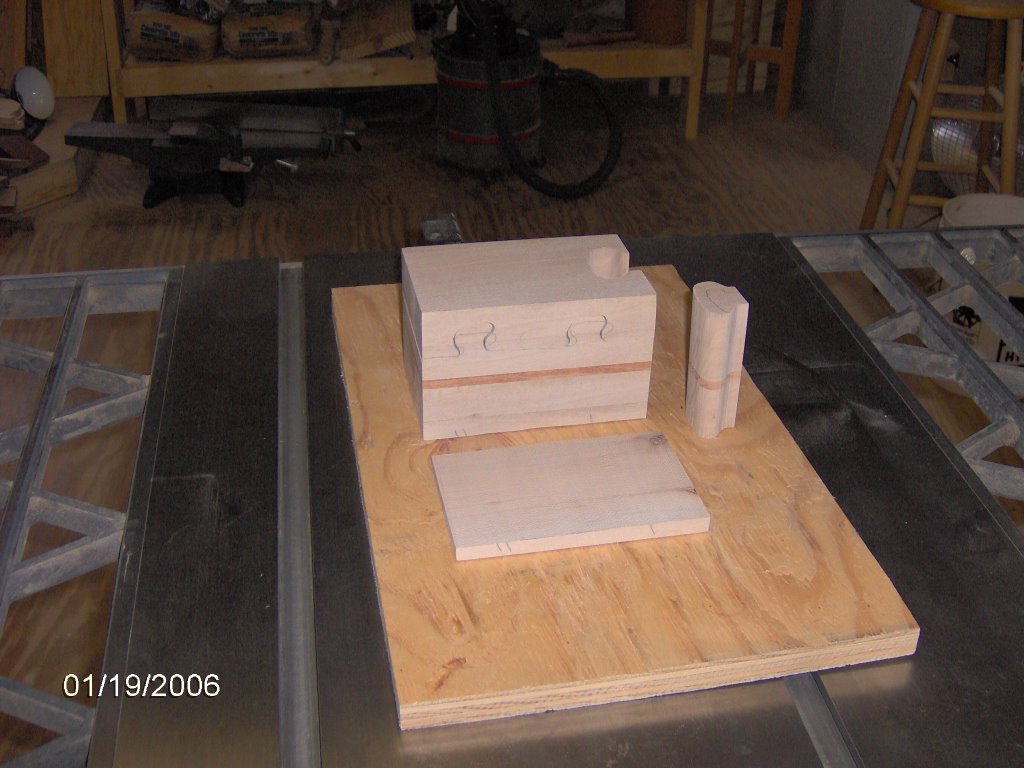
Then you cut out the top, which slide off and on.
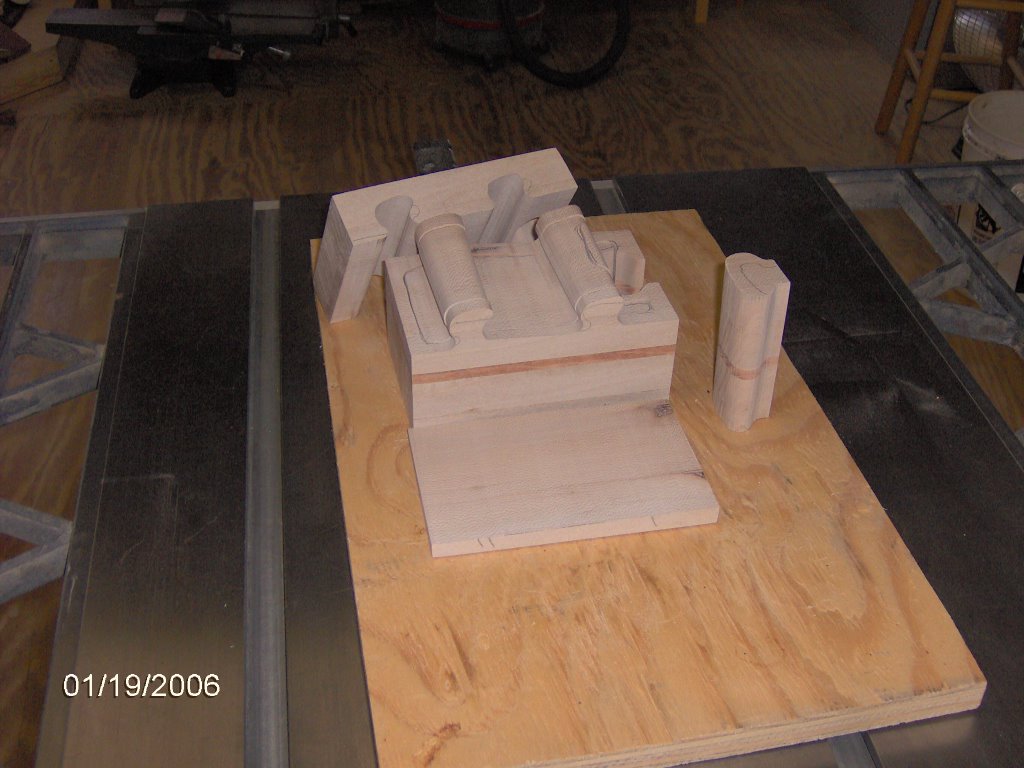
Starting inside where the key goes you then hollow out the box. This part can be discarded or used to make a smaller box later. I have a different idea for it which will be explained later.
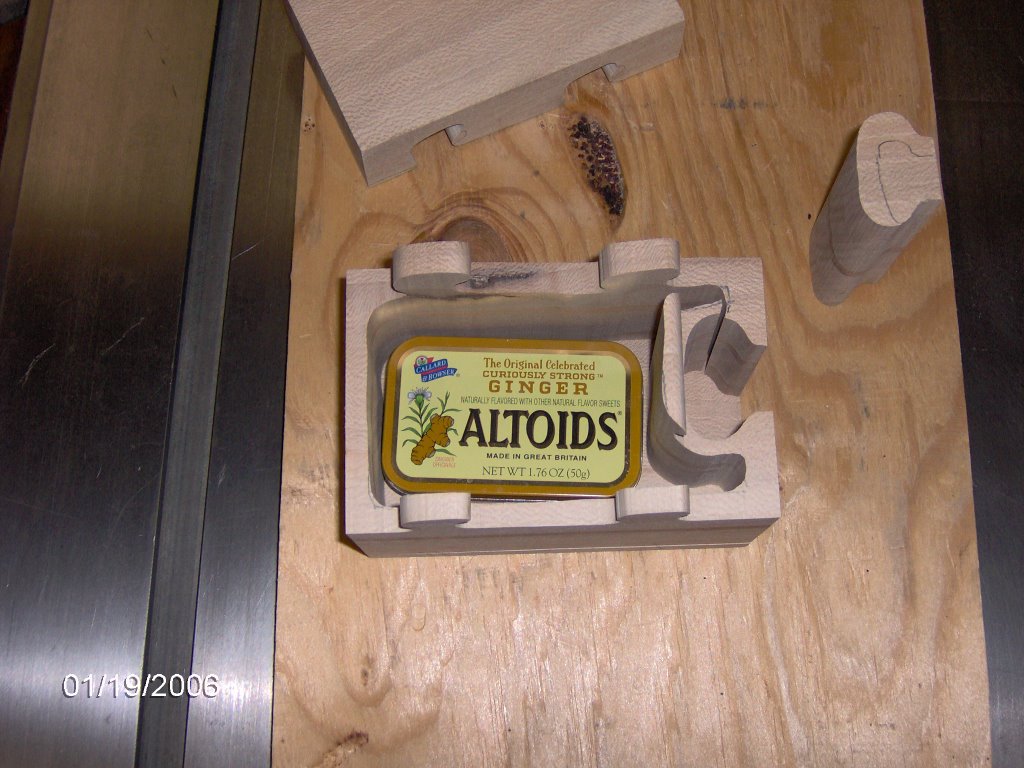
You then glue the bottom back on. Then sand, stain, and finish.

This picture gives you an idea of the storage area of the box.
posted by Tim B. @ 12:32 PM
0 comments
![]()

0 Comments:
Post a Comment
<< Home