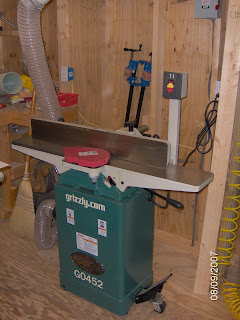
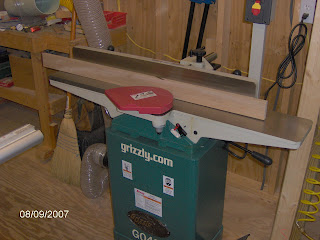
The new edge jointer has been great for making the panels I need for the wine cabinet. Here is a picture of the machine.
Now I’ll show you how to make a panel. I started off many months ago by milling a bunch of pieces to ¾ inch thick and a few random widths, and a few inches longer than the finished length. These sat in the shop for a long time and the stresses in the wood equalized. Here is a picture of where I left off...wow, about 11 months ago!
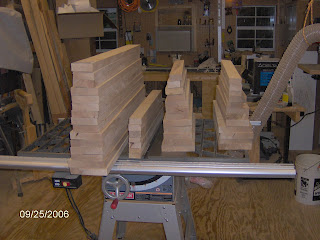
Now the edges need to be worked a little more to make panels.
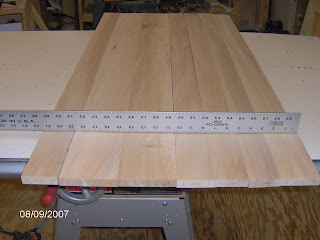
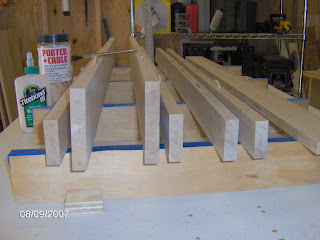
Lay out the pieces so they are a little wider than finished width. I want a 19.5 inch wide panel so at this point I shoot for around 22 inches wide. Then I move the pieces around until the grain patterns are pleasing. Determine which is the good face and turn any defects down. Note how the pieces are butted on the edges but there are gaps.
Now work on the gaps. If there is an obvious bow I clamp the piece into a homemade jig that runs against the tablesaw rip fence. I let the entire bow overhang the edge of the jig and cut it off.
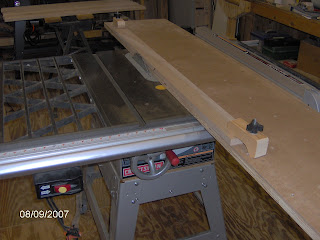
This leaves a very true edge that just needs a pass through the jointer. If the amount of bow is miniscule I can sometimes skip the tablesaw step above. Those of you that know this stuff will probably say "hey, that piece on the jointer doesn't sit flat on the infeed and outfeed table." Right. The picture is just a mock-up/demo.
The process is repeated until all the pieces are true. Then I make an approximate mark on each end for removal. The planer leaves little scooped out areas called “snipe” and it is easier to cut this off as waste than try to eliminate snipe. Snipe can be around 1.5 inches, so I usually add about 4 inches (both ends + a fudge factor) to a desired finished length and then cut about 2 inches off each end. That’s why you start by making things a little longer.
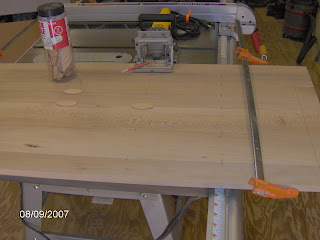
About every 8 inches between the cutoff marks I make a little line across each joint. This is an alignment mark for cutting biscuit slots. Biscuits help with board face alignment during glue up and are supposed to make a stronger joint.
There’s a lot going on in this picture. Lines drawn across both ends for cutoff. Biscuit marks drawn. The biscuit slot cutting tool with the pencil pointing to the red alignment mark. And a couple of biscuits set down to show how they go. The football shaped biscuits get installed in the board edges and will not be seen.
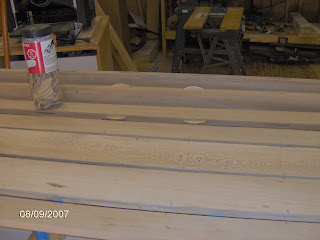
At each mark I cut the biscuit slot. Here I show a few edges with the slots and put in a couple of biscuits for show. For this panel there are 24 biscuits to install, which meant cutting 48 biscuit slots.
Each joint was numbered way in the beginning…1-1, 2-2, etc. I glue and clamp all the odd numbered joints. Glue is spread along each edge, into the biscuit slots and onto the biscuits.
When cured I do the even numbered joints except the middle. And when that is cured I do the middle. The reason I do this as a number of glue-up steps is that I am not an expert and the working time of the glue isn’t very long. There is a lot of glue to spread before assembling the joints. SO I only do a small amount at a time. Here is a picture of the panel in the clamps.

Curing time is about ½ hour in the clamps, and 24 hours before you can stress a joint. Using the above methods I was making a couple of panels a day with the majority of time truing the edges.
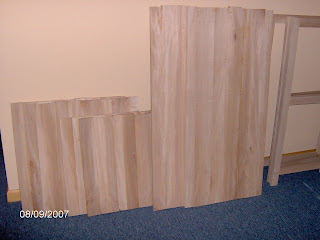
Here are all the panels comprising the cabinet sides, middle, backs, and bottoms. Only 6 are shown. The 7th is still in the clamps.
Next will be to do a lot of scraping and sanding, then cutting to size, and assembly. But for now I'm going to tease with one mock-up picture of the cabinet. I didn't feel like going out to the shop to get some clamps to hold things together, so I just propped these parts together, like making a house of cards. The parts fell over several times before I got it right. You have to use a little imagination. Both sides will look like the left side. There will be a back on the left side, but open on the right. Both sides will have bottom panels at the height of the bottom face frame. The left side will have a glass door and shelves. The right side will hold a wine chilling refrigerator. The top will be one giant wine cork trivet. Of course, this is all rough size right now. It will look better soon.


