Thursday, August 31, 2006

Testing video linking

If this works like I hope:
Click here to see Tim board breaking.

Wednesday, August 30, 2006

Watering "Lucky Bamboo" and a pop(u)lar pen.

A friend recently gave me a "Lucky Bamboo" plant. Did you know that they aren't really bamboo, even though they look like it? Anyway, I have always liked these, but never bought one. They grow in just water. I looked them up online and found that you shouldn't use tap water because municipalities add fluoride, and that causes the leaves to brown. So what to do? Go to the store and BUY distilled water? Not on my dime. I figured out a FREE alternative.

In my basement I have a dehumidifier. About every week or so I pour out the water that is collected from the air around me. I figured that is pretty clean water that hasn't been chemically treated. So I simply filled up a couple of glass jars cleaned out from store bought spaghetti sauce. Voila! Free clean water. It got me to thinking that if I had a fishtank (and I don't want one) it would be good for that too. Just throwing that out there for you fishtank lovers.


The dust collector still hasn't been wired up, but I made another pen. This one is poplar from my neighbor's back yard. I cut the tree down and air dried it for a few years. In fact, it is the same tree as the chess pieces. It finishes up a little green, but will oxidize to brown with time. All the other pens are "green" with envy because this one is so pop(u)lar. Har har.

Compare it to the pens below. This one has a max diameter of 28/64ths (yes, I use a caliper to check) and the ones below have a max diameter of 32/64ths. Not sure which I like better, but the slimmer one seems more graceful.

Monday, August 28, 2006

While waiting for the electrical hookup...

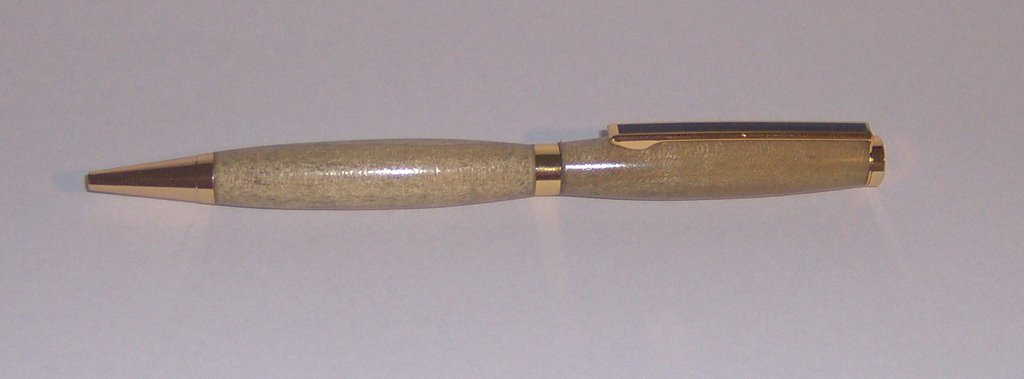
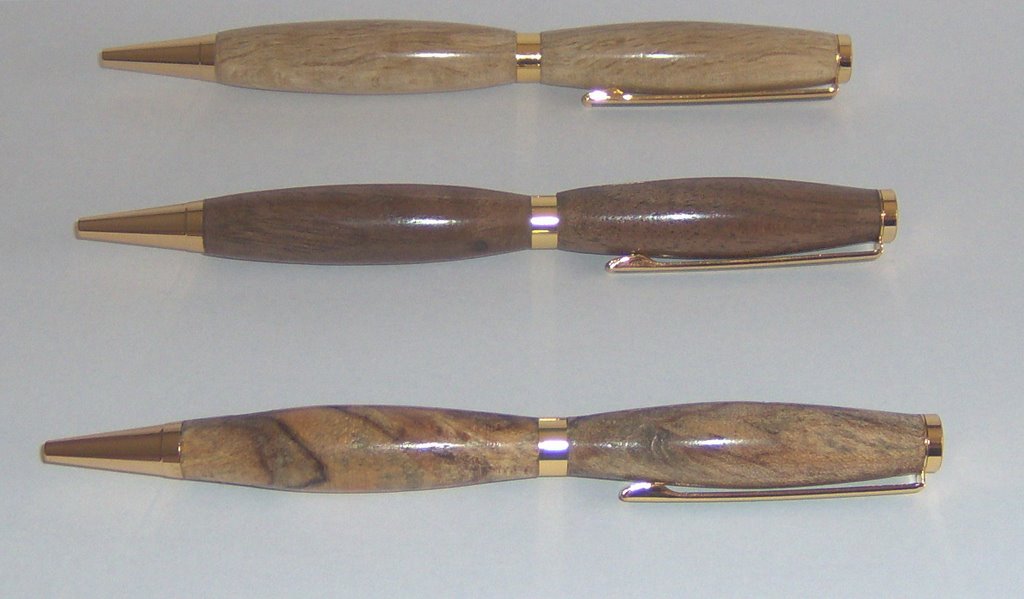
...for the dust collector I just knocked out some simple pens. Made these last night and during lunch break today.

The top one is "Sakura" which is a Japanese cherry and was harvested in downtown Tokyo. The middle is Walnut, which was harvested locally and I got in trade for fixing a guy's computer and printer. The bottom is "Ambrosia Maple" which is a normal maple that was infested by the Ambrosia beetle. A fungus grows, causing the coloring. The beetle feeds on the fungus, not the tree. In any case, there are no beetles in the wood and the fungus is not harmful.

Which do you like?

Friday, August 25, 2006

Started work on the filters

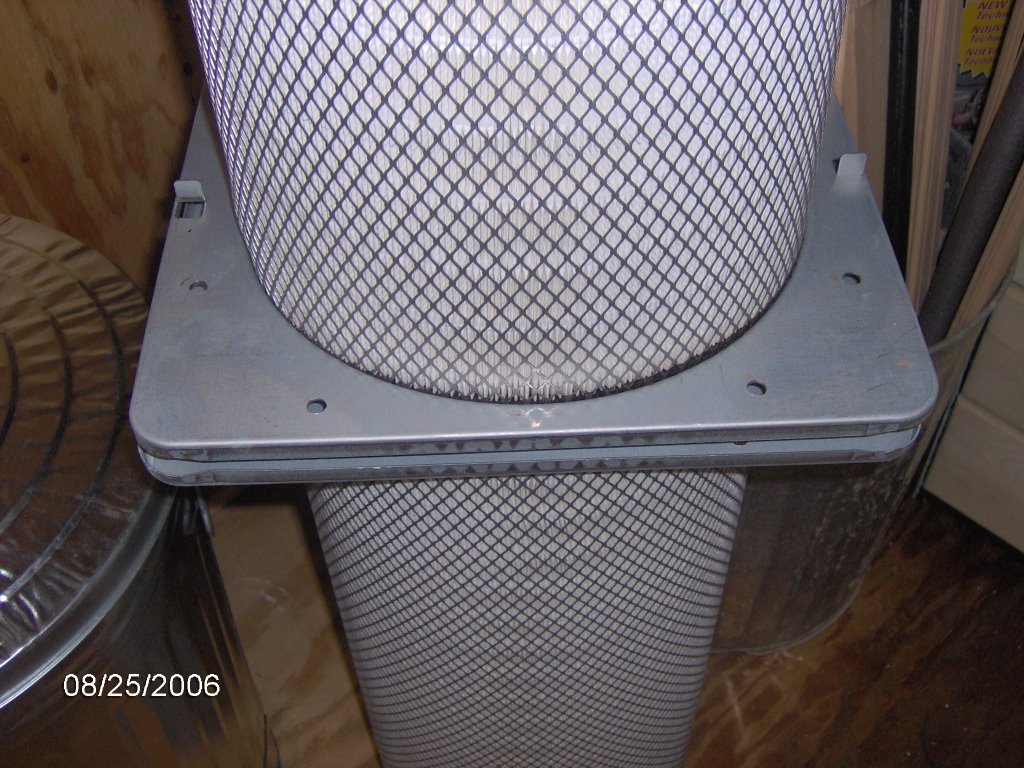
There is a pair of filters that need to be combined into one assembly for the cyclone dust collection system. I started on that last night. The two filters are identical but in order to connect them, the foam weatherstrip needed to be removed from the top of one (on the left). This was done with a razor blade and rubbing with "Goo Gone".


Then one filter was inverted and placed on top of the other.


They need to be bolted together, but the manufacturer does not supply bolt holes. So I drilled 8 holes through the metal flanges. I didn't have the bolts so a trip needs to be made to the hardware store.


The assembly will be elevated and connected to the exhaust port that it is sitting under in the second picture. In order to elevate it, a "cleanout" box needs to be built for the bottom. The height of this box will be the amount of gap seen in picture 2. The box will close off the bottom so that exhausted air MUST be pushed through the filters. However when the DC is turned off, some of that fine dust drops down, so the box needs to have a cleanout mechanism. Not exactly sure at this point how I will do that, but I have two ideas.

Tuesday, August 22, 2006

And I only cut myself once!

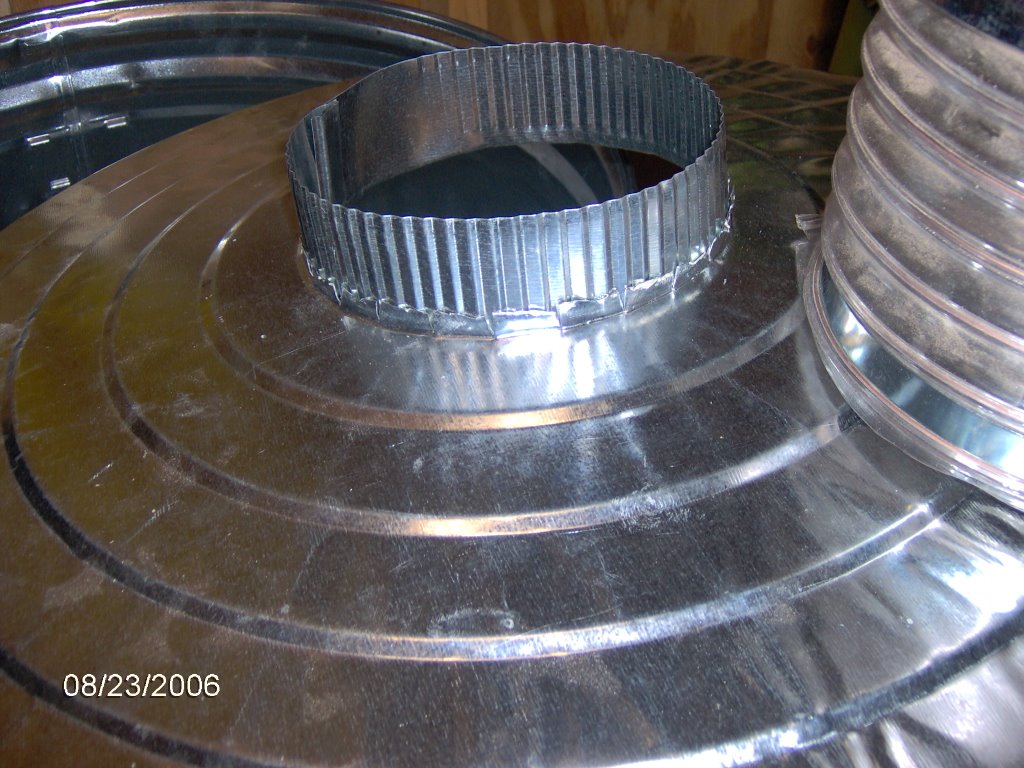
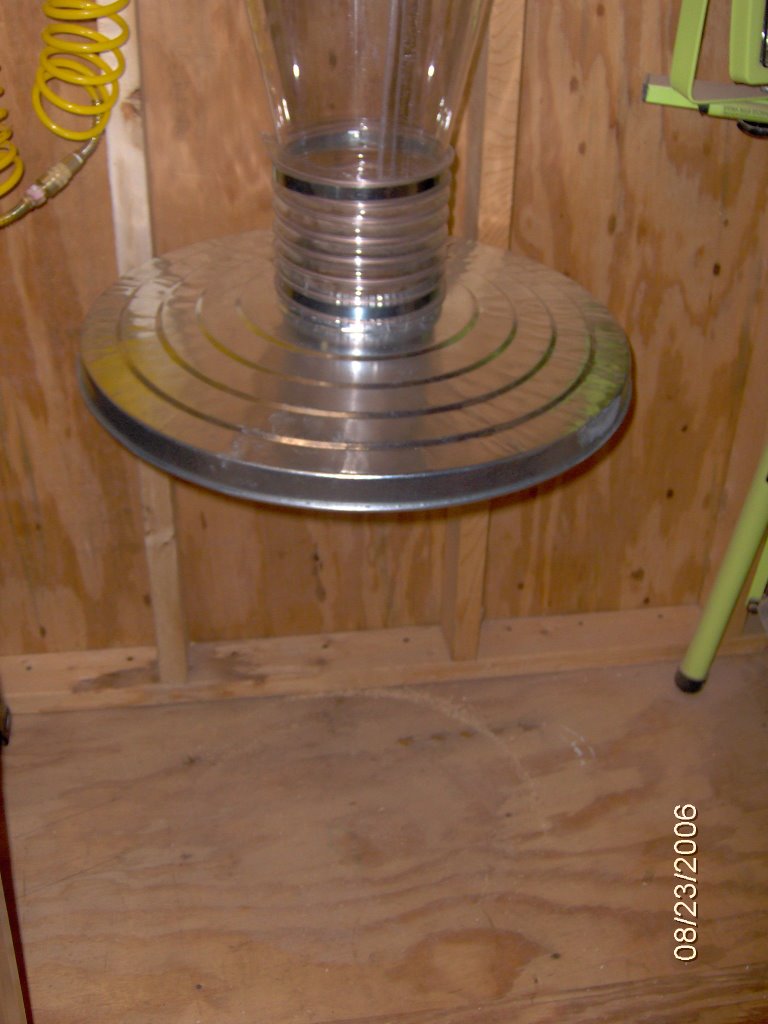
Last night I worked on modifying the lid of the metal garbage can, for the dust collection system, to accept the short piece of flexible hose. I've never done any sheet metal fabrication and really thought this would be a big challenge. but it wasn't as bad as I thought. I wish that I had a better pair of "tin snips" but I made do.

First, using a Dremel, I cut off the handle on the lid. I needed a hole that was 6 inches in diameter but it had to have bent tabs that formed a collar. The tabs are 1/4 inch long and when bent up their bases form the 6 inch circle. So I drew two circles with a compass...one with a 3 inch radius and the other with a 2.75 inch radius, using the same center point. I then cut out the inner circle. Then I cut slits that formed the tabs and used pliers to bend them up, forming the collar. That defined "part A".

For "part B" I took a 6 inch "snap lock" pipe (this is commonly used in heating and air conditioning systems) and cut off a piece about 4 inches long. From one end I measured and drew a line 1 inch from the edge. This piece was to have 1 inch tabs. Then I cut slits defining the tabs and bent them to the line.

Finally I inserted part B into part A and tapped on the tabs to make a good mechanical connection. I still need to add some screws and then caulk to make it air tight. I then attached the short 6 inch diameter flexible hose to the trash can lid and the bottom of the cyclone. I installed the hose clamps, but only temporarily, just to test removing and installing the can. The setup works perfectly!

Shown from inside the lid, Part A is the lid, part B is inserted and has the 1 inch tabs.


Shown from outside the lid, Part B comes through and the lid has small tabs.


The lid connected to the cyclone with the short flex hose and two clamps.


The dust bin in place.

Monday, August 21, 2006

Ductwork almost ready

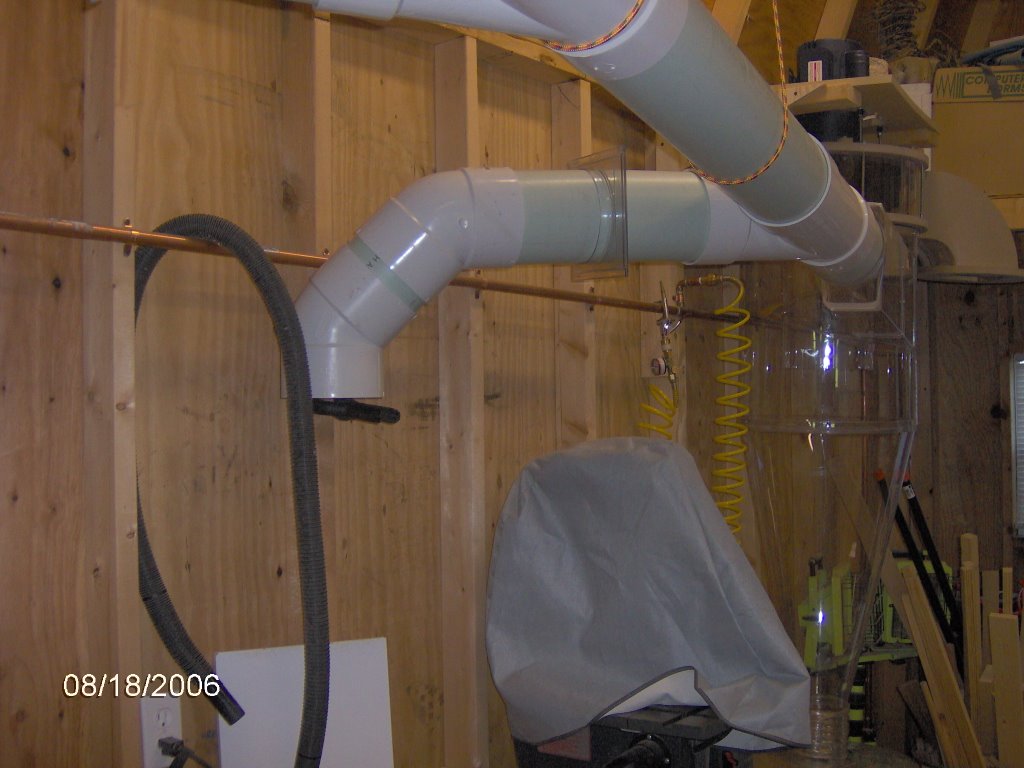
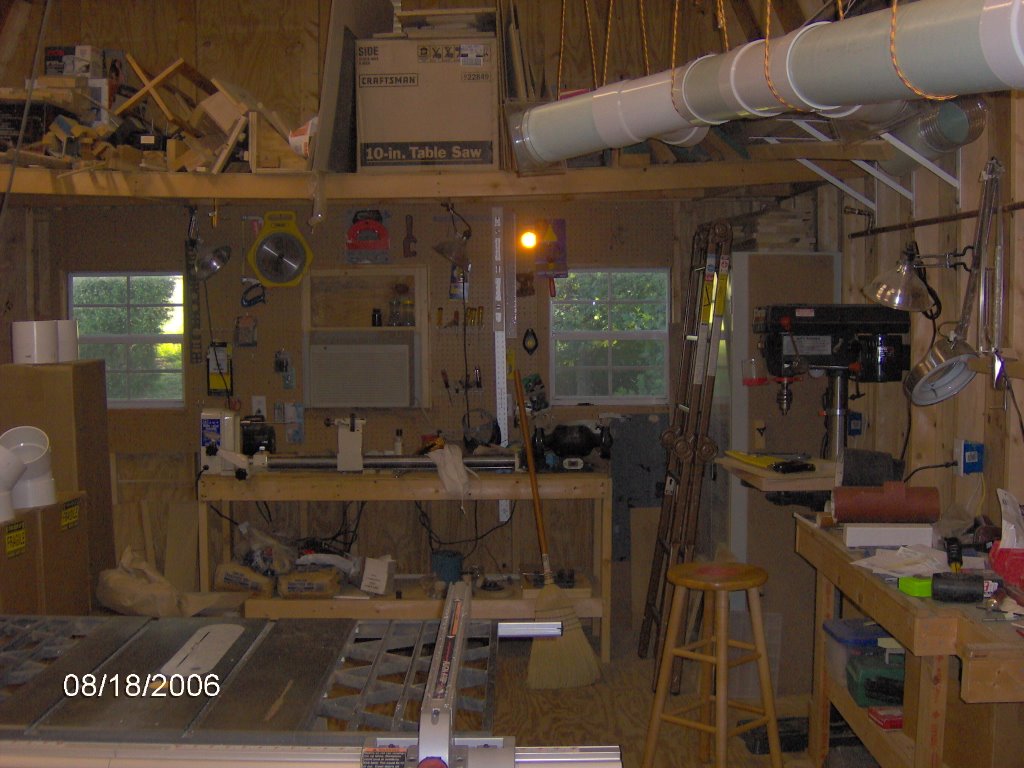
I am very close to having the ductwork ready for the dust collector.

Over the weekend I bought some pieces that have 4 inch connectors, for adding dust collection ability to the table saw, and today I did MOST of the work of adding the pieces to the tablesaw. Just one more part to simply bolt in place, but if I do that now then I can't use the tablesaw before the main DC unit is ready. So I will finish the main unit first. The thickness planer already has a 4 inch port.

Also today, I received the transition pieces to reduce the 6 inch main duct down to 4 inches.

Over the next few days I need to:

  • drill some holes for screws,
  • clean the duct pieces,
  • screw them together,
  • caulk the joints,
  • prepare the steel trash can to collect the chips,
  • and install the filters.

I also need to have the unit wired which can be done any time. It would be great to have a remote control that can clip on my belt which will start and stop the unit from anywhere in the shop, but that may have to wait a month or two. The electrician can install an on/off switch, which can stay in place even when the remote control device is added. That will be a minor inconvenience but only for a short time.

Looking forward to having it operational, probably in a few more evenings over 2 weeks. When it is done the very next thing that should be done is to vacuum the whole shop. There is a fine layer of dust all over and that is very unhealthy to try to sweep.

Friday, August 18, 2006

Dust collector and duct pictures

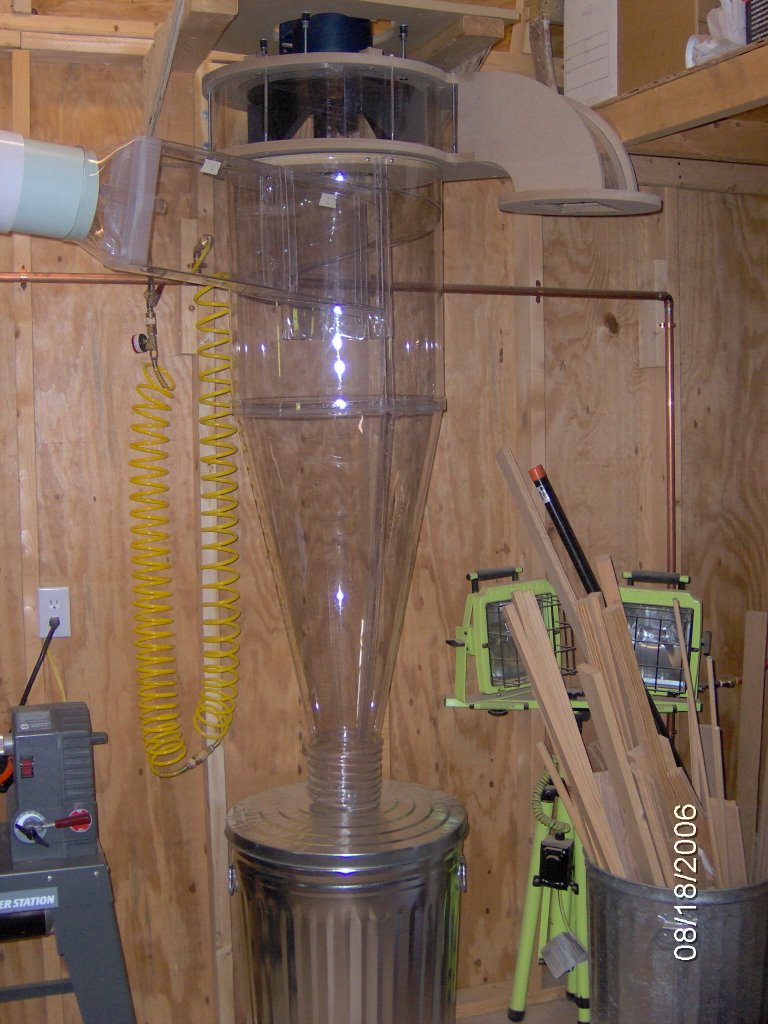
Well, here are some pictures of what I have been working on.

First the dust collection unit itself. It is called a "cyclone". The powerful fan on top sucks dust in to the port on the upper left (where the ductwork hooks up). The dust enters the unit and has to spiral downward, losing velocity. The heaveiest particles will drop into the collection bin (metal can at the bottom). Smaller particles will go UP the pipe that is inside and be exhausted at the upper right where they will be blown into filters, which I have not hooked up yet. This is all tough clear plastic so one can be mesmerized by the action...it LOOKS like a tornado when the dust is being collected.


This next photo shows the trunk line of the ductwork. It has to be straight in line with the input port on the cyclone unit and continue the gradual upward slope. I have suspended it from the ceiling by ropes, which I can easily adjust as needed.


I currently have plans for 4 branches off the trunk line and the trunk will end at the lathe so there will be 5 main inputs to the system. This is the first, going to the tool that is an interchangeable bandsaw and edge jointer. It is a good idea not to put in short radius 90 degree bends, so I split that up into two 45 degree bends. Now the pipe needs to be reduced in diameter to hook up to the tools.


As you can see here the trunk is aimed at the lathe. Some flexible duct will be hooked up and service the lathe. Also you can see here that there is a branch aimed at the center of the shop behind the table saw. That will service the tablesaw, thickness planer, and eventually a router table/cabinet that I will build one day.


What you may not see clearly is that every branch has a shutoff mechanism made of clear plastic, called a "blast gate". You only need to collect from the tool being used and shutting off all the others improves the suction at the tool in use.

Once the system is in place I need to customize the hookup to each tool. Some manufacturers provide ports for this. For instance, the maker of my thickness planer supplies a "dust collector hood". This has a port for hooking up a dust collector. That port is 4 inches and my trunk and branches are 6 inches. So I need to add a reducing coupler and a little flex hose for that tool. The tablesaw does not have a port...dust just falls out the bottom. So I need to build a housing with a port on it. Hooking up each tool will be a challenge, but those are the two I use most frequently and they make the biggest messes to clean up so I will start with those and gradually work on the others. That's the nice thing about a system like this...it is expandable.

Tuesday, August 15, 2006

Duct progress

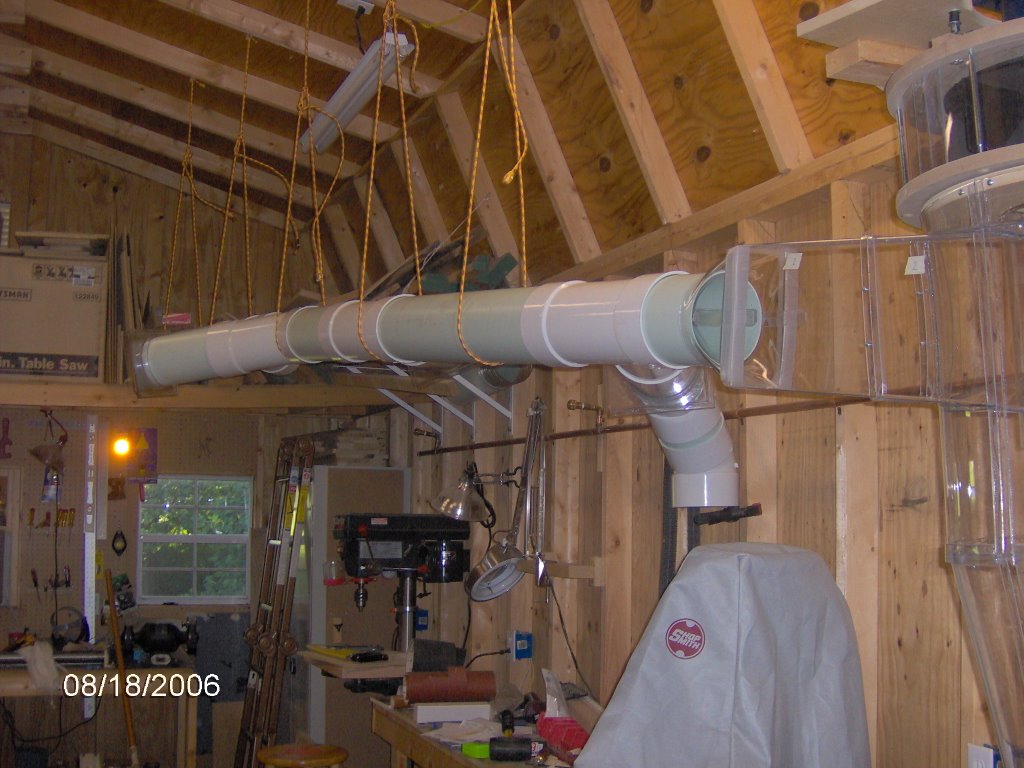
Yesterday my son helped me work on the duct for the dust collector. My only goal for the day was get the hanging ropes in place. It was very hot in the shop, so we didn't want to be out there very long.

The duct will be suspended from the ceiling, but it runs diagonally, so I needed to put an "eye screw" in several roof trusses, in line with the dust collector inlet. The simplest way, I found, was to slip together some straight pieces making a 10 foot run, having my son hold up one end and propping the other end on a ladder. Then I used a plumb line to transfer and mark the center of this temporary duct on each truss. It was then a simple matter to drill, screw in the eyes, and fashion some ropes to hang the temporary duct.

Today we worked on replacing the temporary duct with shorter lengths of pipe and "Y" connectors to go to the various machines. The ropes have been adjusted and the main trunk line is all in place. I realized that I changed my mind from when I made the diagram, so I ended up short by 6 connectors. We placed an order for those and they will be here in a day or two.

Once that is all done the pieces will be cleaned, screwed together, and made air tight with caulk. Then I need to install the filters, have the unit wired, get flexible duct, fashion the dust bin, and on and on. This is a big project but has already come a long way.

Pics soon.

Saturday, August 12, 2006

Why a duck? (Viaduct)

Silly title, I know.

I started working on the ducts for my cyclone dust collection system for the workshop. The main pipes are 6 inch PVC with various "Y" and "elbow" connectors. Nothing difficult, just measure, cut, fit, adjust. I bought more pipe than needed in case of mistakes. The main duct is to be suspended by ropes from the ceiling as it runs diagonally overhead. There will be 4 "Y"s to various machines and the end of the main line will go to the lathe. Everything slips together, but I will add screws at each connection and caulk all the joints to make it more air tight.

Still several weeks away from having it all in place. Then I need an electrician to come and wire up the 220 motor. So, will probably be running this fall. Progress pictures soon.

Friday, August 04, 2006

3 chess set pictures.


Thursday, August 03, 2006

Glass and poison ivory

Way out in my backyard, at the border with the lady that lives behind, there is a lot of glass in the ground. I'm sure it has been there for decades. With soil erosion this glass surfaces. I asked her about it and she said that her parents used to have a house on that property before building her current house and that there was never any garbage pickup, so they dumped "stuff" at various places on the property. Well, I can understand that, but technically it is on MY property. So, whenever I can I go out with a trowel, whisk broom, and bucket and get whatever is easy. Usually I only spend a few minutes here and there. Last week I found a rather nice, intact milk bottle. I cleaned it off and will give it to a neighbor who has wanted one but complained he could only find them at flea markets and didn't want to pay. When held just right I can read some lettering on it that may have been silk screened or bled through a label. Google hasn't turned up anything about the particular dairy, so I am at a loss to determine how long that bottle has been in the ground.

While talking to the lady I pointed out one of my trees that was covered in lush green foliage. I asked her to please stay away from it and keep her grandkids away from it because it is all poison ivy. The vine at the base is as thick as an elephant's leg. As we were talking she kept saying "poison ivory"...what a hick! The poison "ivory" was hanging down almost to the ground so I sprayed it with herbicide, and after a lot of the lower stuff withered I cut that away and hauled it off. That should discourage little kids. Also I can get in there easier with the lawnmower now to keep everything cut real low. In the fall after all the foliage falls off I am going to cut the vine.

Tuesday, August 01, 2006

Various

Sometimes a solution to a problem is so simple that it is easy to overlook or ignore.
I have a riding lawnmower. Every now and then the blades need changing. The manual calls for removing the mowing deck, sliding it out from under the "tractor", changing the blades, then reinstalling. That procedure is a royal pain and a dirty mess. So I have long wanted a better way. I tried putting the ramps on my trailer, driving the mower part way up, and sliding under to change the blades. This worked better, but there wasn't much clearance for me to get under. At least it improved the process. What I WANTED was a pit to get completely under the mower, like they have at "Jiffy Lube" stores for your car. I mentioned this to a neighbor and he said he just jacks up the front end of his mower with an automotive jack. Indeed, I had THOUGHT of that but RATIONALIZED that there wouldn't be enough clearance.

Well, in PRACTICE it worked VERY well when I tried it. Took only a few minutes and I had enough clearance to get to the blades from the side.

TKD Pros and cons:
I like going to Tae Kwon Do because it is good exercise and I get to help others learn. Every 4 months they hold a test for people who will earn the black belt. At our school a person testing for black belt must obtain two letters of recommendation. One from a junior belt and one from a senior belt. I am one of the most senior belts there, so I am OFTEN asked to write these letters. Lately, though, parents of younger kids have been asking me. I don't watch their kids every class, so it is becoming a hassle to make a good recommendation. I think that if I want to avoid this I need to remember that around testing time, if someone approaches me, try to get away before being roped.