Wednesday, August 31, 2005

Tropical room update

Just a couple of things.

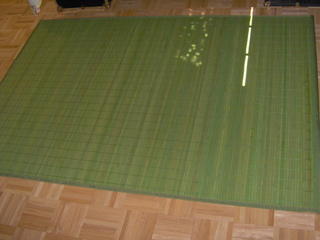
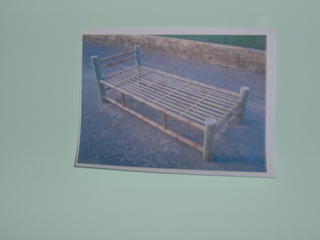
1. Over the weekend I went to the "bamboo lot" and harvested some huge pieces for making the bed. When I got home I cut these to "rough lengths" which are probably about a foot longer than they will be when I actually start making the bed. I put these in a room in my basement to dry, then took cloths and 409 and cleaned all the grime off of them. The material I collected is enough to make the headboard and footboard. Still need to get more to make the side "rails" and mattress support.

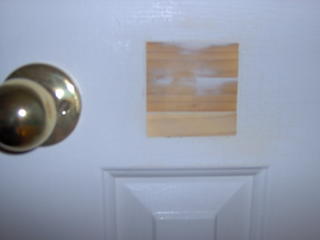
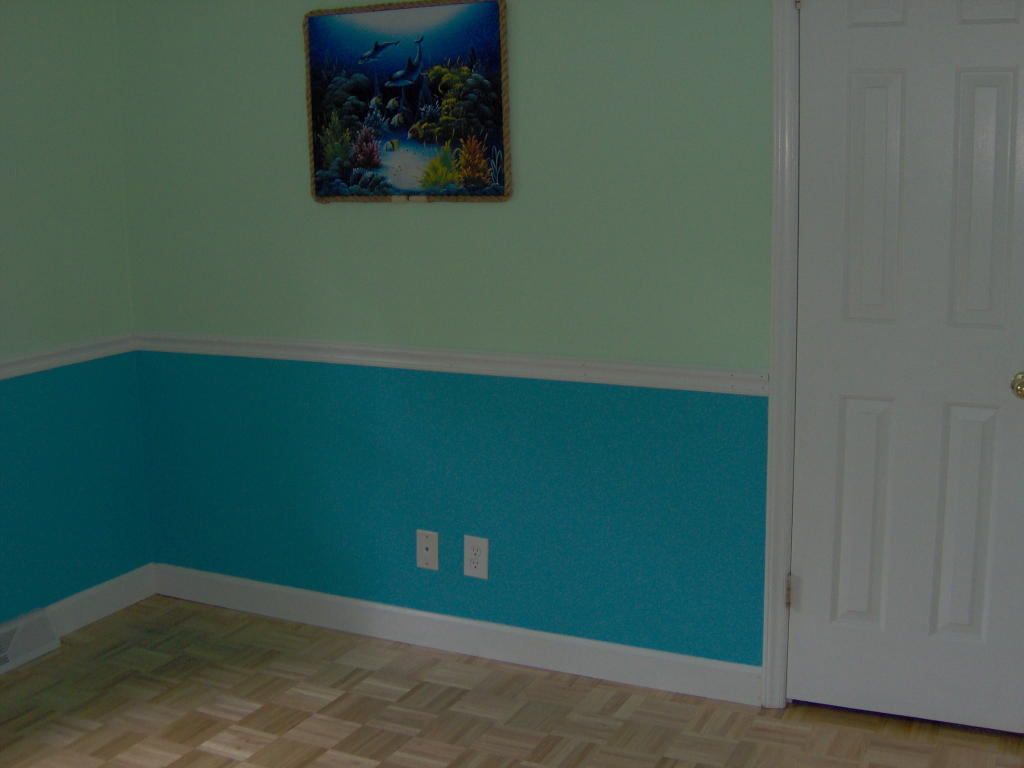
2. I have a small chest of drawers for the room that currently "doesn't go" with the new look of the room. It is painted dark green, over 1 or two other coats of paint. In the past I have used a heat gun, which would cause paint to bubble so it could be scraped off, but for some reason this paint didn't bubble. So I started the tedious and nasty task of using chemical stripper. I started with 3 of the 5 drawers. The work requires ventilation so much of it will be done an hour here and there on the driveway when the weather is good. So far 1 drawer is almost done. The other 2 are about 50% done. I want to have all the drawers done by Sunday evening.

The chest of drawers is inexpensive, but solidly built out of "manufactured pine planks". These are small pieces of pine glued up together to make boards, then cut to length and width. Because of this, the chest is intended to be painted, not stained. However, I am going to leave it unpainted. I intend to add on some pieces across the grain to make it look like it was built out of a crate. This should give one the feeling that he is on an island and things were made out of available resources...in this case, a crate that "washed up" on shore. Should be cool. Perhaps I will use some gray deck stain to give it a more weathered look too. Maybe even stencil on words like "THIS END UP" and "FRAGILE" (Fra-gee-lay...it must be Italian!)

Monday, August 29, 2005

How I fixed the door.

I fixed the hole in the door almost exactly as one would fix a hole in drywall. First, using Microsoft PowerPoint I drew a square, 3 inches on a side, and printed it. I cut that out with scissors, cut out MOST of the inside of the square and taped this in place over the problem spot.


Next, using a Dremel and cutting wheel, I carefully cut out the problem area to the lines on the paper template and removed the paper.


I needed a "backer" for the patch so I cut 3 pieces of wood from a paint stir stick, 1 inch longer than the length of the hole. I applied glue to a half inch on each end, slipped them into the hole, and held them in place for a couple of minutes for the tack on the glue to set up. The top and bottom sticks were done first. The middle was done last. The screws were inserted to give me something to hold to apply pressure as the glue set up.


ONE DAY LATER, after the glue was fully cured, I cut 3 more pieces of stir stick to patch the hole. This particular stick, supplied when you buy Glidden paint, was just about the perfect thickness. Other sticks were too flimsy. I glued the pieces in place and waited a day for the glue to cure.


Next, I applied a filler compound with a putty knife to fill in the gaps. I applied more filler than needed, waited for it to cure, and sanded everything down flush.


Finally, I applied 3 coats of paint, but only on the center "rail" of the door (if I were going to paint the whole door I would have just bought a new one). If you look carefully you can still see slight indentations that mark where the patch is. A little tough to see because the paint was wet and gave off a shine when I snapped the picture. The patch is just about invisible and is easily missed at a casual glance. It is done correctly and I am pleased with it. So much better than what the previous homeowner tried to do (put masking tape over the hole and paint over the tape).

Saturday, August 27, 2005

Floor fix

Just a couple pictures to show how the floor was fixed.
Recall this image of the problem.


The problem was that the quarter section of parquet floor slipped out of alignment before the glue dried, leaving an unsightly gap.

Using a Dremel, chisels, and patience I first carefully removed the quarter section and scraped out the glue residue. I had to make sure not to damage any surrounding wood. Then, I modified a replacement quarter section by chiseling off the interlocking tongues and the bottom half of the interlocking mortise.


I applied some adhesive, laid it in place, and taped it to the other part of the floor until the adhesive set. Next day I removed the tape. Problem solved.


All that's left is to install the shoe molding to completely finish off the floor. The fix went so well that I did another, afterward, in the master bedroom. That fix was for about a quarter of a quarter section. Involved more patience.

Sunday, August 21, 2005

Gotta have shades.

I was out of town for nearly a week. Upon return it was my visitation weekend with my son, so I only got a little done. I'd found these bamboo window shades that are "Roman blinds." They fold as they are raised. It took about 20 minutes per window to remove the old miniblinds and install the new. Also we found a 4'x6' "area rug" made of bamboo. My son and I really like the look. What do you think?

New shade on south wall.


New shade on west wall.


Bamboo "area rug".


Image of future bed frame.


South window with shade open.

Thursday, August 11, 2005

Tropical room update

Yesterday I finished installing the chair rail. Today I will fill the nail holes with glazing compound and caulk the top edge. I dismantled the big, bulky bunk beds and took the framework out of the room. Then, I set the plywood supports and mattresses across a pair of foot lockers. That makes a temporary bed for my son.

Trunk bed.


Bamboo floor lamp.


Walls, doors, and trim.


Walls, doors and trim.


Remaining:
  • fix a hole in one of the closet doors
  • fix a 6"x6" section of parquet floor
  • install shoe molding
  • purchase and install new window blinds
  • touch up paint where needed


Hole in closet door.


Wood floor needing repair.


I do not want to go "overboard" (pun intended) with decorating, but want to do things that have a tropical flair, ala "Gilligan's Island." I already made a bamboo floor lamp, but it needs some datails added. Then I intend to replace the "trunk" bed with a bed frame made of bamboo. I have a nice little chest of drawers that could be painted appropriately. Just a matter of ideas and time.

Tuesday, August 09, 2005

Moving along.

The tropical room is coming along.
Last night I painted the second coat of "Java Sea" on the bottom of the walls and, when dry, removed all the blue masking. This time there is VERY little touch up to do. This morning I installed the receptacle plates.

Perhaps this evening, and some of tomorrow evening, the chair rail molding will be installed. Before installing the base shoe molding there is a part of the wood floor that I should repair. The floor is parquet wood tiles and a "quarter section" of tile slipped out of alignment before the glue dried. This left a pretty unsightly gap. The shoe molding will not cover that gap.

I need to get some touch up paint for the top part of the walls, sand down some spackle spots, and touch up those areas. And one of the closet doors has a hole that needs repairing. SHOULD be documenting some of this with photos. But will do that AFTER installing the chair rail.

Also last night I installed the shoe molding in the closet of the Master bedroom.

Monday, August 08, 2005

"Let there be light !"

And there was light.
Went to Home Depot and got a new socket for the lamp described below. I went home and wired it in and it DID NOT WORK !!! Huh???

There are 3 possibilities.
1. Bad socket. How could I have TWO bad sockets by chance? Not likely.
2. Bad wire or connections or wire connection to the socket. How possible is it that there is a bad wire when it came fresh off a roll of NEW wire? And I was 100% sure I wired it to the socket correctly.
3. Bad wire connection to the plug. Well, I THOUGHT I did it correctly last night, but when I double checked, the wire was inserted into the connector backward. I had reversed the polarity. So I reversed the wire in the plug. Plugged it in and the lamp came on immediately !!

Problem solved!!

So, I put a regular old lamp shade on it temporarily. Now I need to do the decorating touch ups described below. But I have a working floor lamp...the first I ever made myself!!!

Progressing on "Tropical" room. Bamboo floor lamp.

My son's room is intended to have a tropical flavor to it when done. Over the weekend the idea came to me to make a floor lamp out of some bamboo.

I selected a piece that was about 6 feet long and about 2 inches in diameter. Using a steel rod I knocked out all the little node dividers. Simple. Then I trimmed both ends of the bamboo pole. In the shop I cut 2 disks of pine to fit inside the pole as "end caps" and drilled and screwed these in place. The end caps gave me a place to attach the lamp hardware on the top and a place to attach a base on the bottom. Then, using a stool top as a template, I cut out a 3/4 inch piece of plywood circle and attached it to the bottom of the pole. It was now freestanding.

On Sunday I purchased lamp hardware. I drilled a hole for the wire at the bottom of the bamboo pole and in the pine disk at the top for the lamp hardware. Then I attached the hardware and wired it all up. It doesn't work! I tried it out with a new bulb, then with a known working bulb. No good. In examining the package for the bulb socket more closely it seems that I got one that required some special wiring. Then looking even closer it seems it was intended for 220 current. Aha! So, today I will get the correct bulb socket and wire it in tonight.

Next will be to add finishing touches. There are 3 ideas here.
1. Attempte to make a lampshade that resembles the thatched roof of a tiki hut, or get a grass hula skirt at a costume shop and work something out.
2. Decorate the base some more. Maybe get a steel pan, or ammunition box, or make a base that looks like it was made from a crate that washed ashore. Stenciling on words or partial words (FRAGILE/THIS END UP) may add to it. Some kind of base to give the idea that we are on a tropical island and used available material. I will put the pole IN a container and fill it with pebbles and moss.
3. Wrap the single pole with smaller poles of bamboo and tie them all together with pieces of copper wire. Thinking along the lines of those small jars of "lucky bamboo" that people seem to be selling everywhere...bundles tied together.

The new moldings have received their paint. I need to paint the bottom of the walls with a second coat. Then I can start all the touchups. Will get some pictures soon.

Tuesday, August 02, 2005

Masked and ready to paint

This evening I cleaned the walls and floor. Then I masked off all the baseboards and casings around the doors and windows. Ready to paint. The pictures are a little dark because of bulb lighting. I took them after sundown.


This last picture is a representation of the room color scheme...sea foam green above, "Java Sea" below, and white chair rail between. The rest of the room moldings and electrical outlets will be white and I will likely get new white window shades too.

Monday, August 01, 2005

Next project...son's bedroom.

This bedroom project should be a little easier than the others.
My son's bedroom has plain walls that are painted sea foam green. I want to add a little to it by putting in white chair rail and a different color that will go along. The top of the room will remain sea foam green. A dear friend helped pick out a coordinating color (Glidden color, "Java Sea", 18BG 41/313). The two look really nice together and will look REALLY smart with the white chair rail between.

Not sure how the furniture will look, however, I had an idea. I asked my son if he would like to have a hammock in his room and he said he would. I only have him every other weekend so it shouldn't be detrimental to his sleep or his back to sleep 2 nights every two weeks in a hammock. He currently has bunk beds. I will leave those in the room for a while to see which he prefers.

Anyway, I want to make a hammock that will go with the new paint scheme. I decided to make an A-frame from which to suspend the hammock...like backyard swings or swingsets. The hammock can be made from cloth that can be chosen to go with the room. I can rig it all up except the sewing on the fabric. The frame can be painted 2x4s.

The work will be done in a couple of phases, starting with the painting and molding. Will take and post pictures along the way. It should be a really neat room when done.