Friday, March 31, 2006

The completed barrel

In case you were wondering, the "gift barrel" is done. Stain was applied and I made hoops out of bicycle tire rubber. Figuring that the rubber would wear out and need to be replaced some day I only made them a "stretch fit." In other words, they aren't glued in place. Just strips glued into a loop like a rubber band and stretched around the barrel. I think it came out pretty cool...what do you think?


Tuesday, March 28, 2006

JP's pen

Jean Pierre is out of school for today and tomorrow. I took 2 vacation days so we could spend time together. We had some fun in the workshop. He turned his first pen, walnut, on the lathe. He rounded the parts, then I gave him a little instruction on shaping the barrels. I helped out a little there because curves take some practice. After that he sanded and I helped remove sanding scratches. He polished it and applied the finish and we pressed the parts together. It's a really pretty pen and he is so pleased with it.


The proud lathe man and his creation...yep, he's a lefty.


For myself, I spent a little time looking through some poplar firewood for the whitest of pieces for making more chessmen. So far there are 3 pieces done. I found a piece of wood that should yield 3 more chessmen. So I need to find wood for 10 more chessmen somewhere. Unfortunately my firewood has been laying around a little long so it is deteriorating. But it really is amazing to cut into a hunk of crappy looking firewood and see beautiful, useable wood inside. Like finding a pearl inside an ugly oyster.

Sunday, March 26, 2006

JP's bonker.

Jean Pierre was so excited about the chess bishop that he wanted to watch me turn a pawn, which I did. But more importantly, I gave him some instruction on the lathe and guided him through turning a rectangular piece of wood into a cylinder. He was a little afraid at first, but lost that initial fear as the piece became more round. Gouges "chatter" in the beginning because of the corners that need to be knocked off of the wood. SO, he has his first "finished" wood working project...a "bonker".


As for me, I have a bishop (nearly done) and a pawn (done). The pawn was completely sanded, finish was applied, then parted from his base. Will finish the bishop tonight.

Friday, March 24, 2006

1 of 32. Or rather, 64.

I have started on turning the chess men for the gift for a friend..64 because I am going to make 2 sets...one for my friend and one for me, which I will hand down to my son some day. The first piece is a white bishop, which started out as firewood from a poplar tree in my back yard. I rounded it, cut it with a little extra length and chucked it into the lathe to shape it. The piece is just over 3 inches tall and a little under 1.5 inches at the base. The little ball at the top is about 1/4 inch in diameter. The king and queen WILL be 1.5 inches at the base and should fit nicely on a board of 2 inch squares.

So far it has only been "burnished" with wood shavings, which gave it a little shine. I want to experiment with finishes, on scraps, before applying a finish to this. That is why it has not been "parted" yet from the bottom block. One applies finish to a "turning" while the piece is spinning on the lathe, so I need to keep it attached for now.

It took me about an hour to do this, because I am still a lathe rookie. I imagine that when I get to the repetition of the pawns I will knock them out quicker. What do you think?

Monday, March 13, 2006

Part 4 of coopering, with pictures.

Getting closer to done.

Making the bottom:
I set the barrel down on a piece of wood, reached inside, and traced the inside profile onto the wood. Then I took that to the bandsaw and cut it to the line. the piece fit like a glove. I tapped it in place with a 1/4 inch inset and nailed it in place. The nail holes will be covered later with the simulated hoops.


Making the top:
1. I measured the top of the barel at it's widest point on the outside edge and added 1/4 inch for overhang. Then I set a compass to half that and drew a circle on a piece of wood. I presed hard on the compass point to mark the center. This I drilled and put a screw through the center point so just a little of the point stuck out. Then, on my bandsaw circle table I drilled a matching center point hole. I put the screw tip into the hole, turned on the bandsaw, and turned the piece to cut the perfect circle.


2. Next I mounted that circle to a face plate on my lathe. I measured the smallest diameter inside the top of the barrel and set that up on a caliper. I turned down HALF of the "top disc" until the caliper fit. Then I sanded it with a nice roundover.


Making the knob:
I took a block of wood and turned a nice little knob and fastened that to the top.


With that, the woodworking construction is done. Now I need to sand, stain, and make the simulated hoops. For sake of a picture I drew circles with a Sharpie Marker to give a vague idea of two of the 4 hoops.

Finally, I had a little time last night to make a burlap bag as a liner. I bought a small piece of burlap and some upholstery thread. I measured and cut a piece off. Then I folded over a flap and stiched that in place. That made the "tunnel" where a "closure string" goes. I folded the "bag" in half lengthwise and stitched the two cut ends. Then I turned it inside out and threaded a new, short nylon shoelace through the tunnel. It turned out better than I could have hoped for and on the first try. I put the bag in the barrel and test-filled it with the coffee beans. There was only a small amount of the one pound remaining in the paper bag after filling up the burlap bag.


Awesome! Almost done!

Thursday, March 09, 2006

Cooper, part 3, with pictures

OK, pictures will tell the story better, but I will add text just in case. The text for a picture will be above the picture.

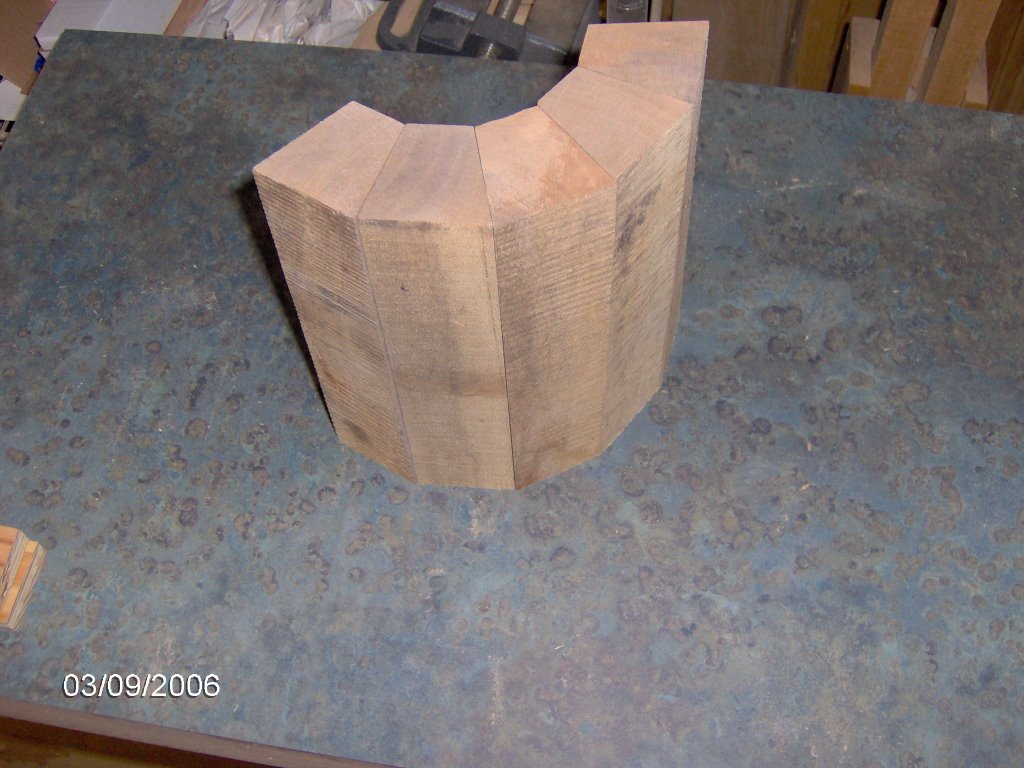
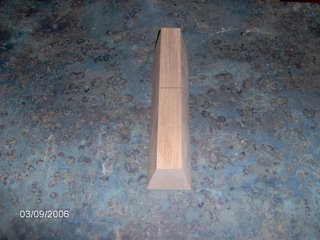
This is a picture of a barrel stave before the curve is cut. It is a trapezoid and is 8 inches long. The pencil line is on the "inside" of the stave at exactly the halfway point, and is used to align the stave for cutting the curve.


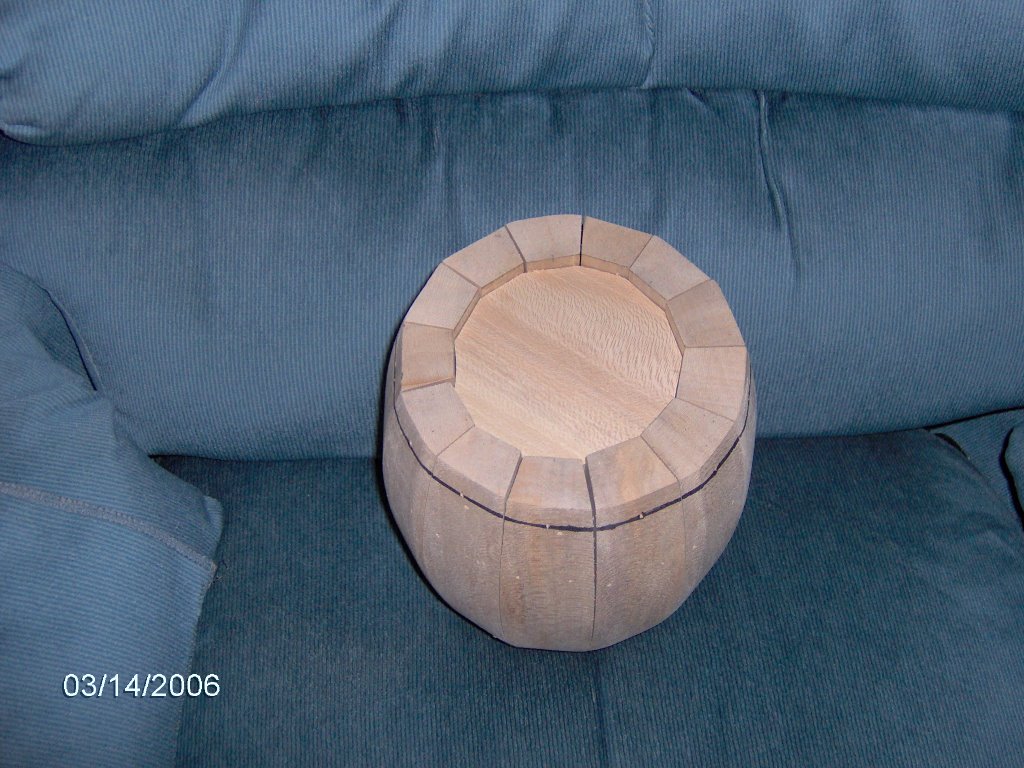
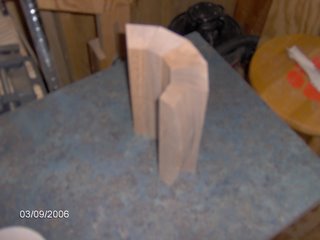
13 of those staves when placed together form a circle. Here is one view with only 5 staves.


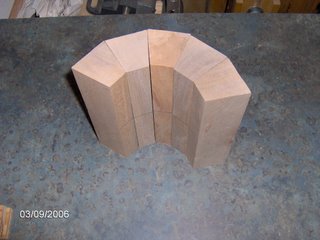
And here is another view.


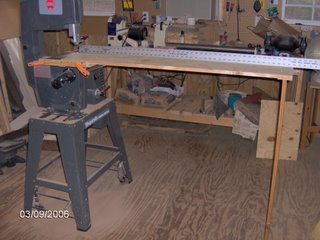
To cut the curves accurately I needed a circle cutting jig. This consists of a table and a swing arm.

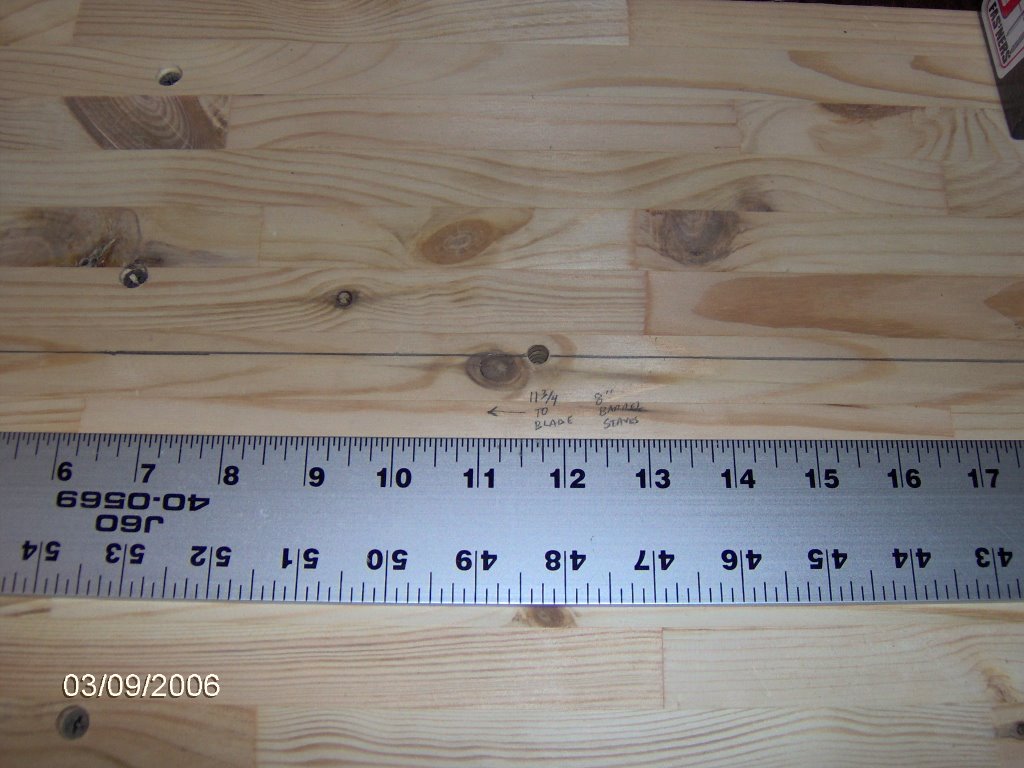
Here is a picture of the table, attached to the bandsaw. For these pictures I have set a metal ruler on it. The table is 4 feet long and supported by the metal table of the bandsaw and a support leg on the opposite end.


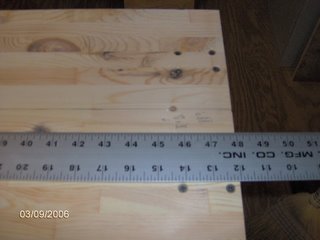
Looking at the top of the table, I have drawn a center line down the entire length. This is in perfect alignment with the teeth on the bandsaw blade. On this line I have marked and drilled holes at 11.75 inches (for an 8 inch barrel)...


...and 45 and 5/8ths inches (for a 20 inch barrel), which I LATER found was a mistake!! The hole is supposed to be at 47 inches. So I simply drilled another hole, which is the BEAUTY of this system. Wherever I need a new center point, measure, mark, and drill a new hole.


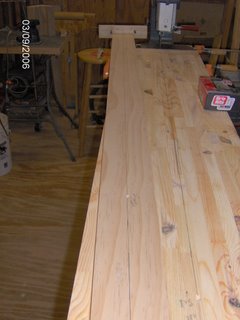
The other part to this system is a "swing arm", which is made up of 2 parts. The first is simply a long piece of wood, marked with a center line just like the table. The other part is short and is a "carrier" for the stave. They are simply screwed together. This picture shows both parts...


...and this picture is looking down the length.


Holes are drilled in the swing arm, just like in the table, on the center line. The swing arm is placed on the table and the two holes are fixed together with a 1/4 inch dowel. The dowel allows the swing arm to, well, swing. In this picture I set a screwdriver on top pointing to the dowel. Sorry it's out of focus.


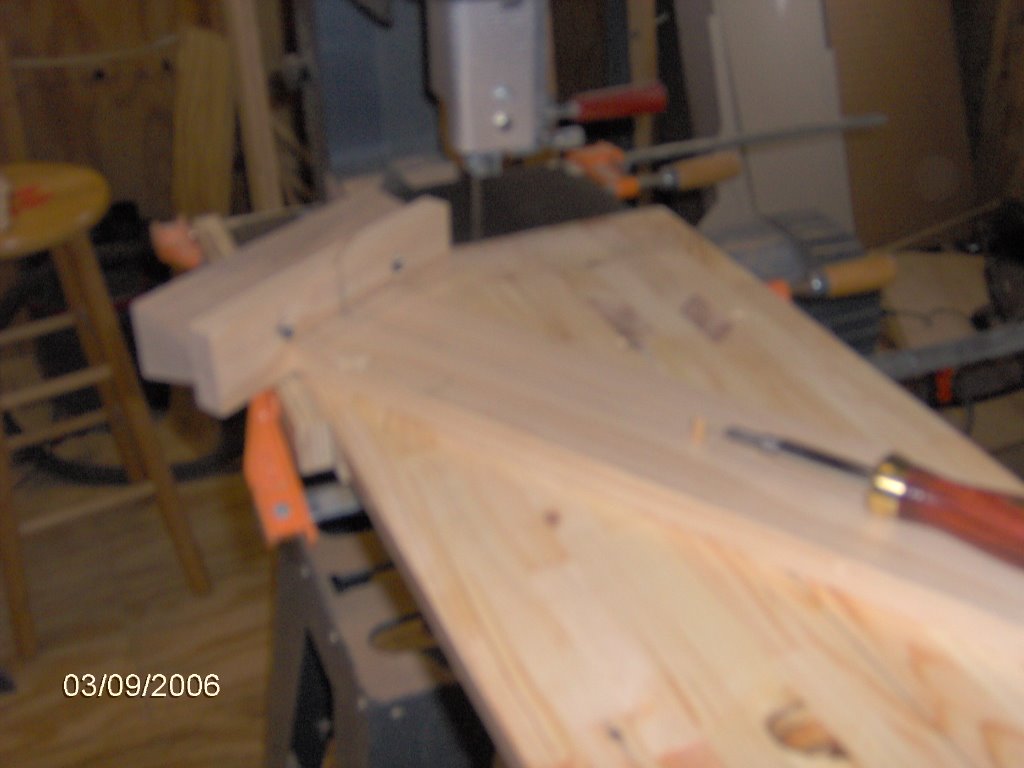
To cut a stave it needs to be mounted onto the carrier part of the swing arm. Marks are made for alignment and it is held with short screws.


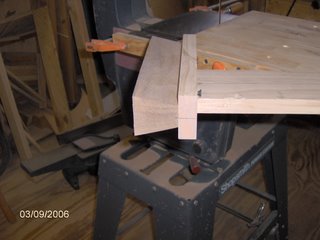
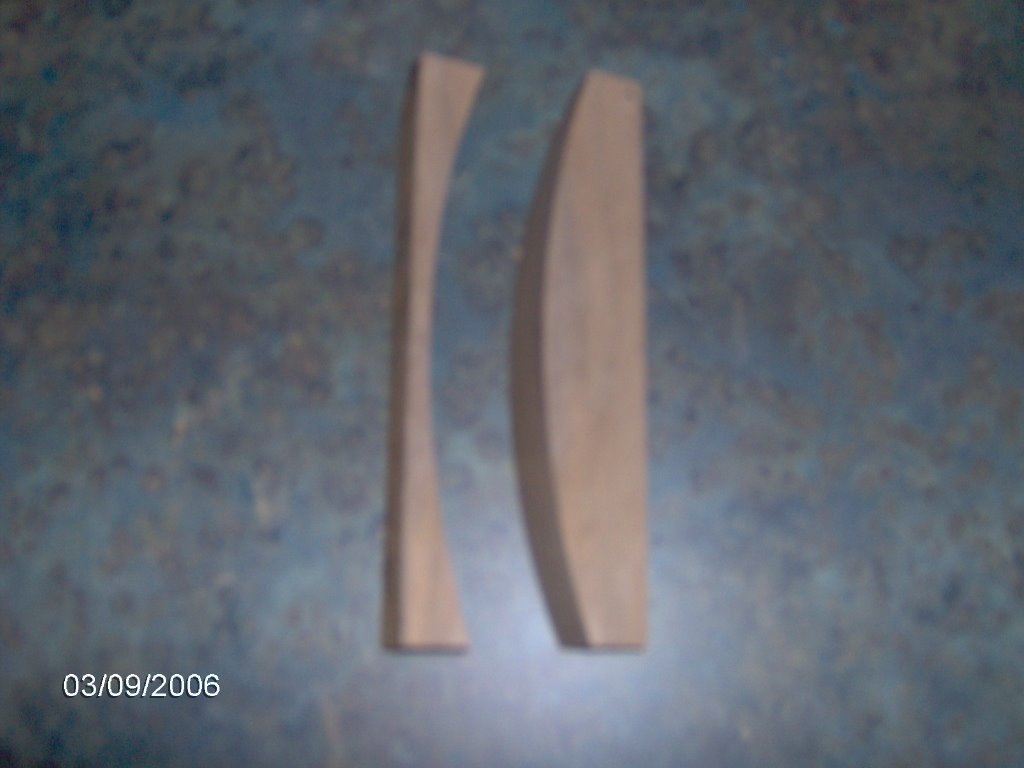
After cutting the stave is removed from the carrier and the waste part (left in the picture) can be discarded (a little blurry).


This picture (blurry) shows the stave just cut in relation to the other staves.


Finally, when the process is repeated for all 13 staves, and those are fastened together, it starts to really look like a barrel.


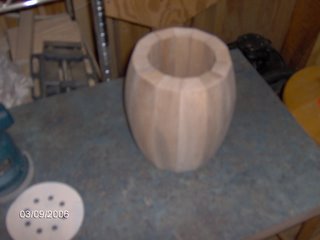
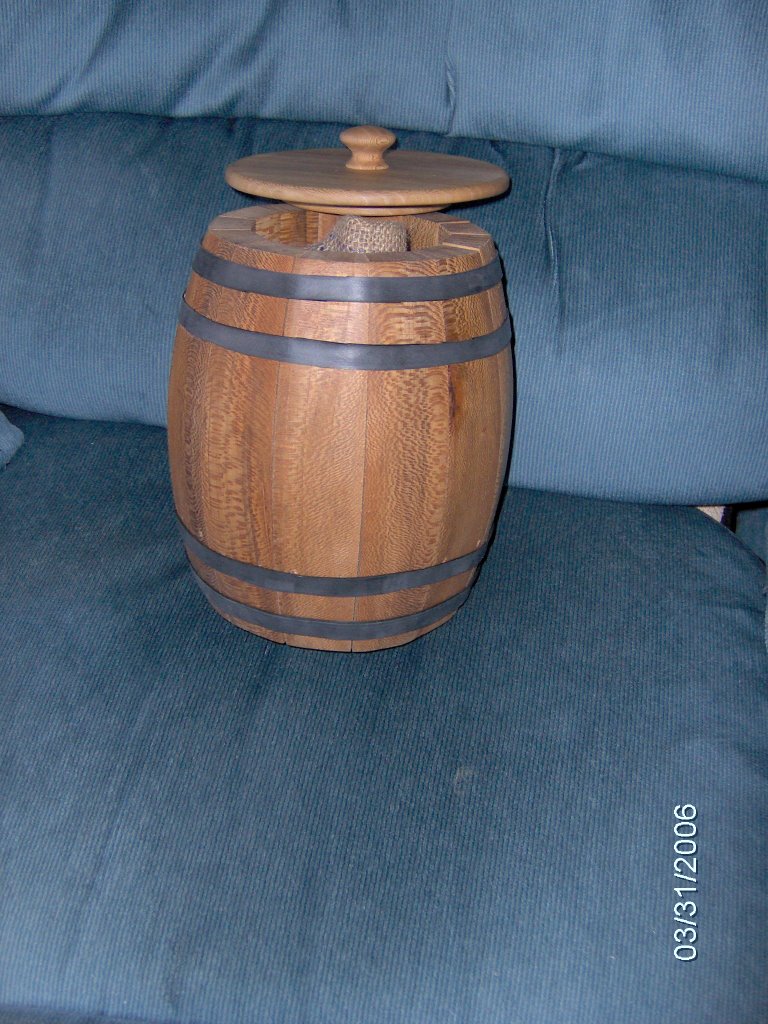
At this point the barrel needs some sanding but I'm not going to make it a beautiful polished work of art. Maybe 120 grit max. Then some stain...no finish. It should look a little weathered and worn to be authentic.

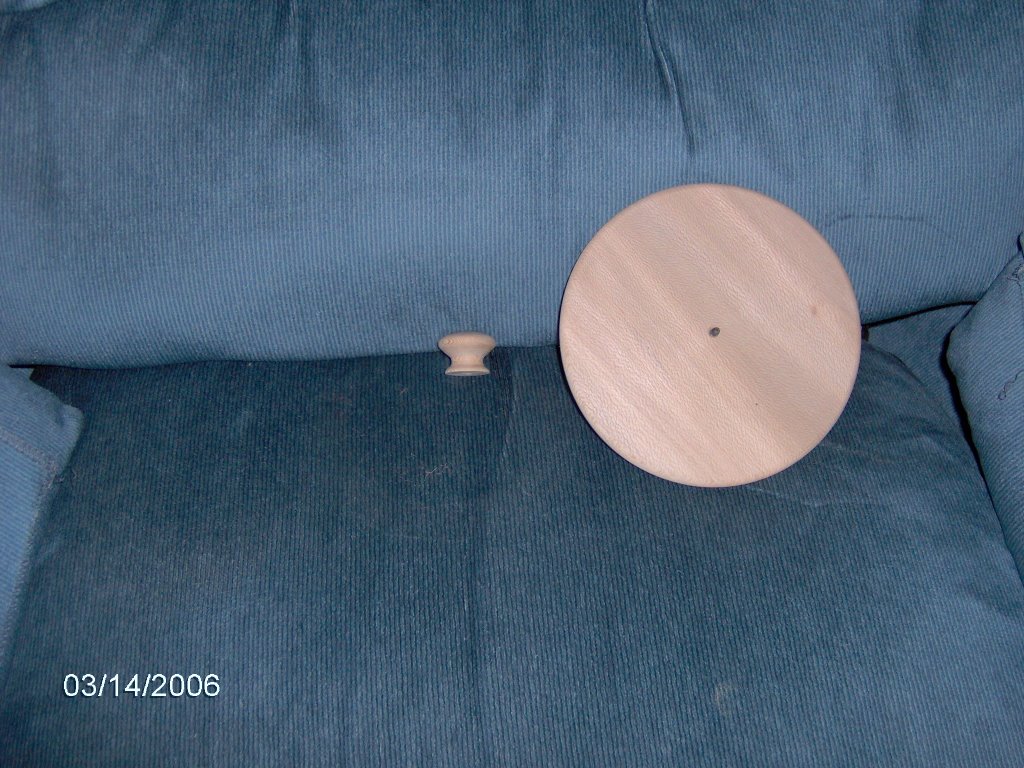
Now I need to make a permanent bottom and a removeable lid. Then I will take some black strap material and surround it to look like barrel hoops.

N'est-ce pas?

Wednesday, March 08, 2006

Cooper, part 2

The barrels I am making aren't made in the traditional way. These are merely barrels in a decorative sense, not made to be watertight. A traditional barrel is made with thin "staves" that are bevelled on the edges, then bent and held in place with metal hoops. My barrels start out as thick staves which are bevelled on the edges, then a curve is cut into the outer edge. The metal bands that will be attached are for LOOKS, not functional to hold the barrel in shape.

So, with that in mind, I needed to build a jig for my bandsaw to cut that curved outer shape. The staves (for the 8 inch barrel) are all cut into thick trapezoids. But I am going to make some 20 inch barrels too. I bought 2 plans from one company. They sell plans for FOUR different sized barrels. Each plan describes how to make the jig for cutting the curves. But here's what they don't tell you. You can build one jig, for their largest sized barrel, and simply drill and utilize different "pivot points" for making the smaller barrels.

Why is that a problem?
Well, let's say that I only wanted to make an 8 inch barrel. I make the jig, which consists of two parts, sized to make the 8 inch barrel. Then a year from now I want to make a 20 inch barrel. The jig will not work....too small...so I need to make ANOTHER jig for the 20 incher. Now I have TWO jigs taking up space in my workshop. Silly !

I think that company should tell you to SIZE the jig for their largest barrel (20 inch) and tell you to cut the parts to that size. But then each "plan size" just tells you where to drill the pivot points. I don't mind paying them for that information. It's their right to sell different sized plans. But with a little forethought, they could really save a person time and effort.

OR, as an alternative, they could sell 1 book, for a higher dollar amount, that contains a table of dimensions and necessary pivot points for ALL their barrels, but directions to build the jig only once.

Luckily, in my case, I decided that I want to build their smallest and their largest barrels. So I purchased the 2 plans and as I was browsing them I recognized this situation BEFORE making the jigs. SO I have sized the jig for the largest barrel and will make the pivot point modifications for the smaller barrel (which, incidentally is REALLY easy...measure and mark two points, and drill holes at those points).

So, what is the jig?
It consists of 2 parts...a plywood "auxiliary table" that attaches to the metal table of the bandsaw, and a "swing arm." In each of these a hole is drilled (pivot point) and 1 short piece of dowel is inserted into both holes. The dowel marks the center of a circle. The distance along the swing arm and the table where the holes are drilled define a different arc for the outside of the barrel staves. Short stave = small circle. Long stave = large circle.

In a short afternoon I have built the aux table and swing arm. Now I need to fasten the aux table to the bandsaw table and drill the pivot points. I am not strictly going by their plan when it comes to fastening the aux table, but it will function the same.

Pictures will tell a lot, so I will post some in my next entry. And I should be close to having the small barrel done too.