Thursday, July 28, 2005

Update on the office/music room

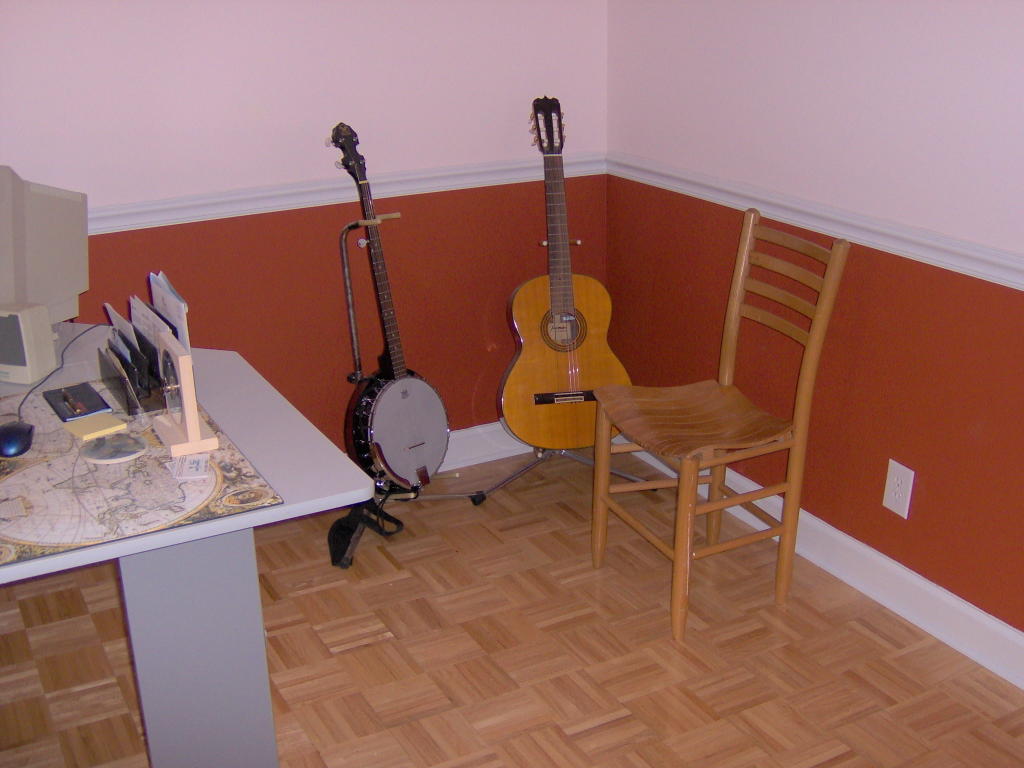
Since the master bedroom is complete I have started setting up the office/music room. The first picture is the corner with a chair and banjo and guitar. I will be building a music stand in the future.


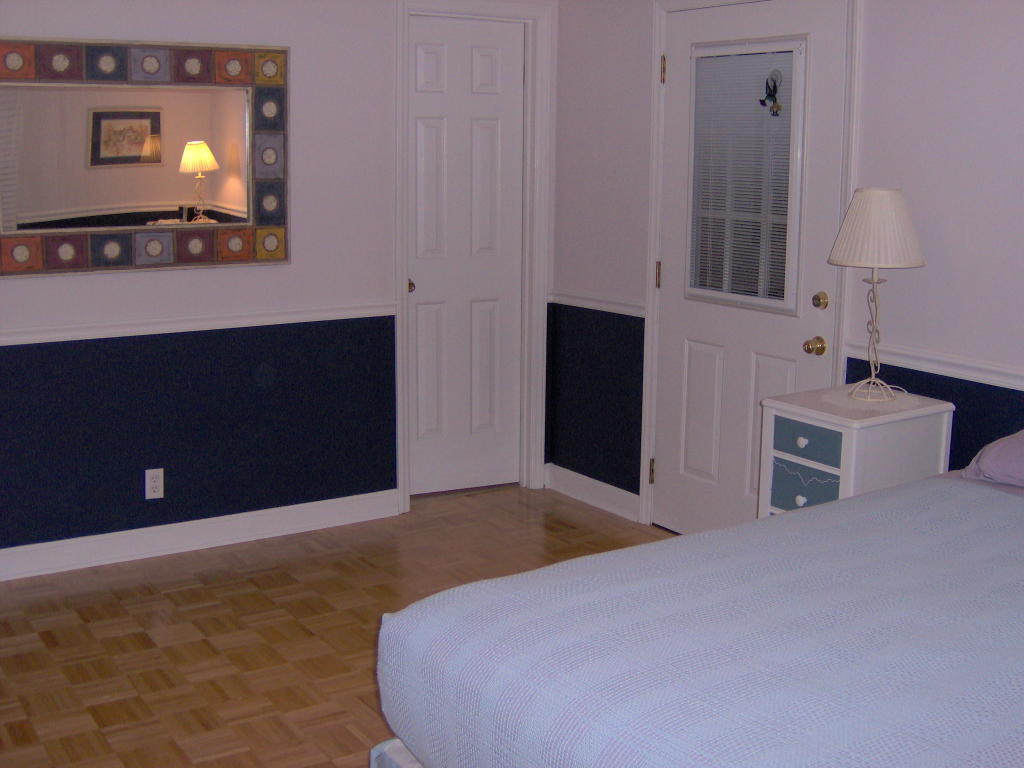
Turning to the left is the office part. I had given this "L" shaped desk to a neighbor. The other day we were talking and he asked if I wanted it back since he didn't need it anymore. The timing couldn't have been better. It is a decent temporary desk until I can build one. The filing cabinet in the corner is solid cherry from a tree I cut down in my backyard. I had a professional woodworker make the filing cabinet. The floor lamp in this second photo has an interesting story. About 10 years ago it tipped over and the lamp socket for the top bulb holder was broken. It was unsafe to use at that time, but I always figured I would fix it one day. I tried 10 years ago, but couldn't figure how to expose enough wire to put in a new bulb holder. Then, tonight, I got the idea of pushing some wire up from the bottom of the lamp. Seems simple NOW as an AFTERTHOUGHT. Anyway the bulb socket was cheap and it took about 20 minutes to fix. Now my old lamp has new life. I like this kind of lamp because it is really good for having next to a chair for some reading. You can add more light and direct it right onto your book. It will also work well in my new office.


Finally, as I was organizing I came across a door stop that I had when I was a bachelor the FIRST time. It is a cast iron Scottish Terrier raising one leg. Perfect as a door stop or bookend. The door doesn't NEED to be propped open...I just like my little Scotty.

Monday, July 25, 2005

Master bedroom completed.

It's done!!!


Later on I will put more into the finishing touches, such as bedding, window valance, area rug, etc. And of course, I will be building furniture such as dressers, end tables, and bed (headboard, footboard, and rails).

One more major project off the list!

Saturday, July 23, 2005

Harry Potter and the Half Blood Prince.

Bought the book on the day it was released. Read it casually over the week and finished it on Friday. It was very good and really advanced the saga. Now I am looking forward to the next book (2 years?) and the next movie. Not going to post any spoilers.

Master bedroom nearly finished.

Today I finished installing the moldings and filling the nail holes (glazing compound is the best). Tomorrow I will caulk and do paint touch ups and the room will be finished. Hopefully by tomorrow night I can be moved back in. The room has a ceiling fan and I love using it during the summer. The room I am temporarily using does not have a fan. I rehung the mirror and the picture that I brought back from Italy (Trevi Fountaing drawing), which goes over the bed.

Pictures will be included with the next post.

Tuesday, July 19, 2005

Having trouble coping.

Cute, huh?
I'm talking about doing coping cuts on the ends of 4 pieces of chair rail molding. It is sufficiently complicated as to make it a pain in the rear. Shoe molding is much simpler and that will take very little time.

I have cut and fitted the chair rail pieces (5 of 9) that do not require cope cuts. Not nailed up, but they should be tonight. I've coped one piece after 2 botched attempts. Was kind of hot in the shop, so I put it off till late, then was too tired to keep at it. Will try more tonight.

Monday, July 18, 2005

2 kitchen projects coming up

1. I painted a panel for the front of the trash compactor. It is ready to install and will only take about 20 minutes.
2. I bought a stained glass hanging lamp which will go over a little "table for two" that I have. The thing is heavy and I will need to add support in the attic over the kitchen ceiling. Already have it figured out HOW to do that and will try to document it with pictures. Sure wish I hadn't done all that attic insulating a couple of months ago. It will probably take me a few hours over a weekend to get that done.

Ready for moldings

At lunch today I went home and set up to start working on the chair rail and shoe moldings for the bedroom. I had to clean up the shop somewhat, set up the compound miter saw and an auxiliary support with a roller on top, and set up a work table for doing cope cuts. I hope to get everything cut and installed over 2 evenings. Then it's fill nail heads and caulk, then a little touch up paint. Should be moved back in before the weekend.

Yard work pending

Got my trailer back from the neighbor. In the next few days I will go get some (free) dirt from the local quarry and start filling in holes around the yard. Rotting tree stumps and roots have made the yard rather uneven in places.

A little more bushhogging

Cleared up a little more of the overgrown backyard. I set the deck on the mower a little higher at first to avoid accidental dents. Then lowered it and went around again. I cleared out enough to allow me to walk around and spray Round Up on more poison ivy and weeds.

Bedroom Window Done.

Fifteen years ago I bought this house. All the moldings in the master bedroom AND the window were painted puke green. The moldings have since been painted over. The walls are now painted for a third time. But the window remained green behind a white miniblind.

Well, no more! I cleaned, sanded, and painted that window, then put up a new shade. It is now a bright white and looks great. No longer hiding an eyesore, the shade can finally be opened at any time. The outside of all my windows need some care, however. But I may not be doing that this year. They all need scraping and repainting. In most cases there is glazing compound that needs replacing. But they are ok for now as I continue working on the inside of the house.

Thursday, July 07, 2005

Master bedroom window and pictures.

Here is how the bedroom window is progressing.
Recall that it started out as puke green. Also I had pictures on the wall that were thatched houses, matted in pink. The mattes have been replaced with dark blue. I am working on the window in phases. It is glossy, so first I rough it up with a sanding sponge. This is tiring so I only work on a few of the individual panes at one time. It takes 3 coats of white paint to completely obliterate the green. I started with the bottom sash. Except for the 2 panes on the lower right, the rest has 3 coats. The paint started peeling off of the bottom "rail" of the sash so I used my razor blade and took it down to bare wood. A little sanding, primer, and 2 coats of finish paint should make that look good.
Window and picture to the left:


The upper sash has been mostly sanded and 3 of the panes have been masked. Can't get to painting that until next week because of vacation. Here is the window by itself:


And finally, the window and picture to the right:

Wednesday, July 06, 2005

Work on bedroom progresses

Last night I finished painting the new moldings and will start installing them tonight.

Also, I started working on painting the window. Not fun! The window was originally puke green, semi-gloss. Then, years ago everything in the room was painted except the window. A few years later the ex and I put paint stripper on the window and forgot about it. So, now it is a mix of dried paint stripper, flaking paint, puke green semi-gloss, and grime. Using a sanding sponge, I started sanding to give the new paint something to hold on to. Then vacuumed and wiped up dust. Then masked and started painting. There are 2 sashes with a total of 12 true divided lites. I masked 4 and painted them with two coats. One of them got 3 coats which I found is what it takes for this job. This morning I took off the masking tape around THAT lite and some of the paint peeled. I learned how to hold the paint with a razor blade as I take the masking tape off for the rest of the window.

This afternoon I cleaned and masked the remaining lites on the bottom sash and put a bit of tape where the paint peeled earlier. Tonight I should have the bottom sash all painted.


Also, I have been painting the metal panel for the trash compactor. I was running low on Gloss Black spray paint and found some spray paint that is made for appliances, so I took that home and coated the panel. It will take MANY light coats to get it right. Not a job to hurry.

Tuesday, July 05, 2005

Random musings

1. Changing the oil in my Jeep is a REALLY simple job. I decided I would do this myself more, rather than take it to my mechanic to do it.
2. Changing the blades on my lawnmower sucks. It takes quite a bit of work to detach the deck and roll it out from under the tractor. Then I don't have the right sized wrench for the nut holding the blades, so it required a bit of squeezing of Channel Lock pliers. Then reinstalling the deck is just as much trouble as removing it. I figured out the tricks, but this isn't a task that is done very often, so I might forget by next time.
3. I learned how to drill out an aluminum pop rivet. This is going to be a good thing to know...guaranteed.
4. I learned that Formula 409 is probably the BEST thing for cleaning up kitchen grease. Probably better than Simple Green and other Orange cleaners.
5. Painting moldings is simple, yet BORING.

The appliances in my kitchen were all Harvest Gold when I bought the house. That includes a trash compactor. Over the years everything has been replaced with black, except the trash compactor. In removing and opening up the door of the thing we found that panels were included for white, brown, Harvest Gold, and Avocado. NO Almond or Black !! SO I put brown in place, which looks a HECK of a lot better than the gold. Then took a panel to the garage to clean, and paint Gloss Black. In a few days that will be done and reinstalled. This is only temporary until I remodel the kitchen. At that time the trash compactor will be removed and replaced with a cabinet.

Post July 4th weekend update.

So, what did I/we get done? Well, I neglected to mention that I had a sister and brother in law coming to town. They helped with stuff around the house, but I didn't have the moldings ready, so the bedroom didn't get finished. Other stuff looks great!

  • Changed oil in Jeep.
  • Changed mower blades.
  • Cut the grass.
  • Hung some pictures in kitchen.
  • Hung valance over kitchen window.
  • Purchased new mattes for 2 pictures in bedroom.
  • Installed the mattes and hung the pictures (wow...they look great!)
  • Removed door of trash compactor and changed yellow panel to brown (temp fix).
  • Painted moldings (first coat).

May sound like a lot, but there was a lot of down time too.